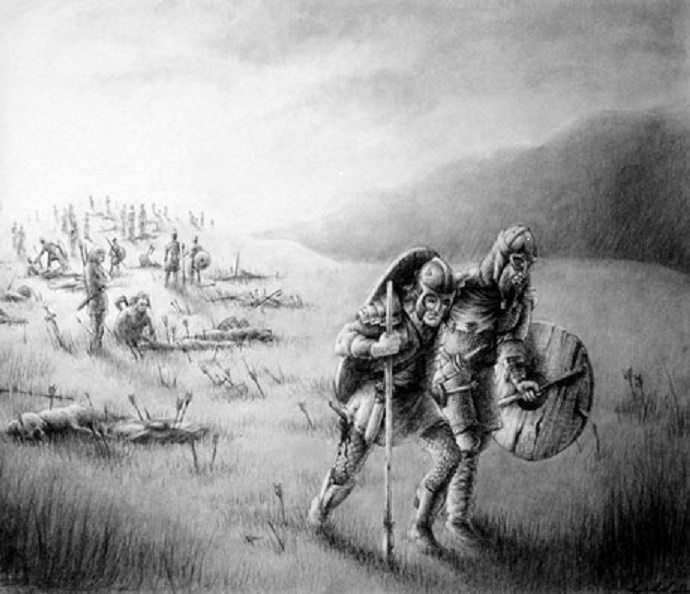
Unique among the territories of the Western Roman Empire in the 5th century, Britain succeeded in holding back and even reversing the tide of Germanic conquest for nearly two centuries. This was an age of heroes… It was the Age of Arthur!
This is the Nineteenth-part of our discussion of Britain in the 5th though the mid-6th Century A.D. It is a fascinating period, with the Classical civilization of Greece and Rome giving way to the Germanic “Dark Ages”; the sunset of Celtic-Roman culture in Britain.
(Read Part Eighteen here. Or start from the beginning, with Part One!)
ARTHUR RETURNS SOUTH
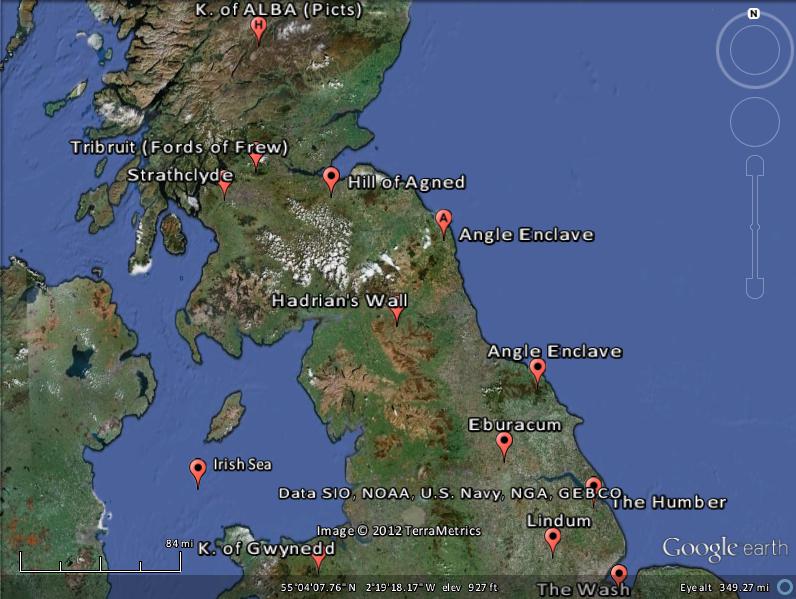
Geoffrey of Monmouth states that Arthur was in the north, at Alclud, subduing the “Scots and Picts”. Alclud is obviously Alt Clut, the original name for Dumbarton Rock, the chief stronghold of Strathclyde. This meshes well with the scenario described here previously, in which Arthur is in the north fighting outlaws (the “Dog-Heads”) and Angle pirates near Din Eidyn (Edinburgh) at the battles of Tribruit/ Tryfrwyd and Agned Hill (Nennius’ 10th and 11th battles). News of Ælle’s invasion would have reached him there, likely before the Saxons crossed the Thames at Londinium; a trading town, and traders are always willing to sell information in time of war to both sides. Word of the gathering of longships and warriors in Kent would not have gone unnoticed in any case, and the Britons in the south would have been laying in supplies and preparing for the worst.
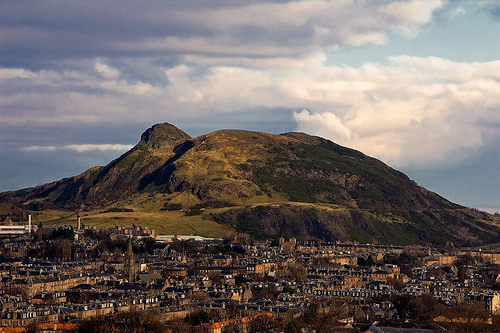
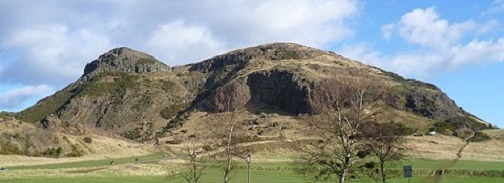
Whether Arthur was still at Din Eidyn following the victory at Agned Hill (identified earlier as the volcanic rock known as Arthur’s Seat at Edinburgh; see Part Seventeen), or had moved to Alt Clut in Strathclyde as Geoffrey suggests; he was in the north and had to cover some 450-500 miles (depending on location and route) as quickly as possible. Speed was essential!
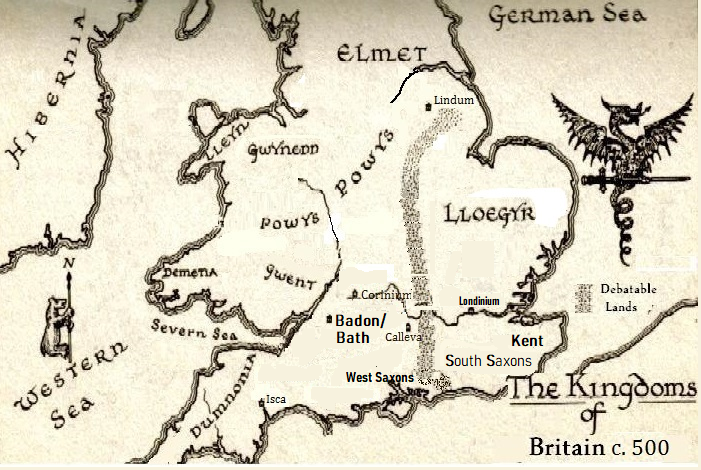
 This was an existential crisis of the first order. If Badon/Bath fell to the Saxons, Romano-Britain would be cut in two. Arthur’s own native kingdom of Dumnonia would be isolated, and a fatal blow struck to British unity.
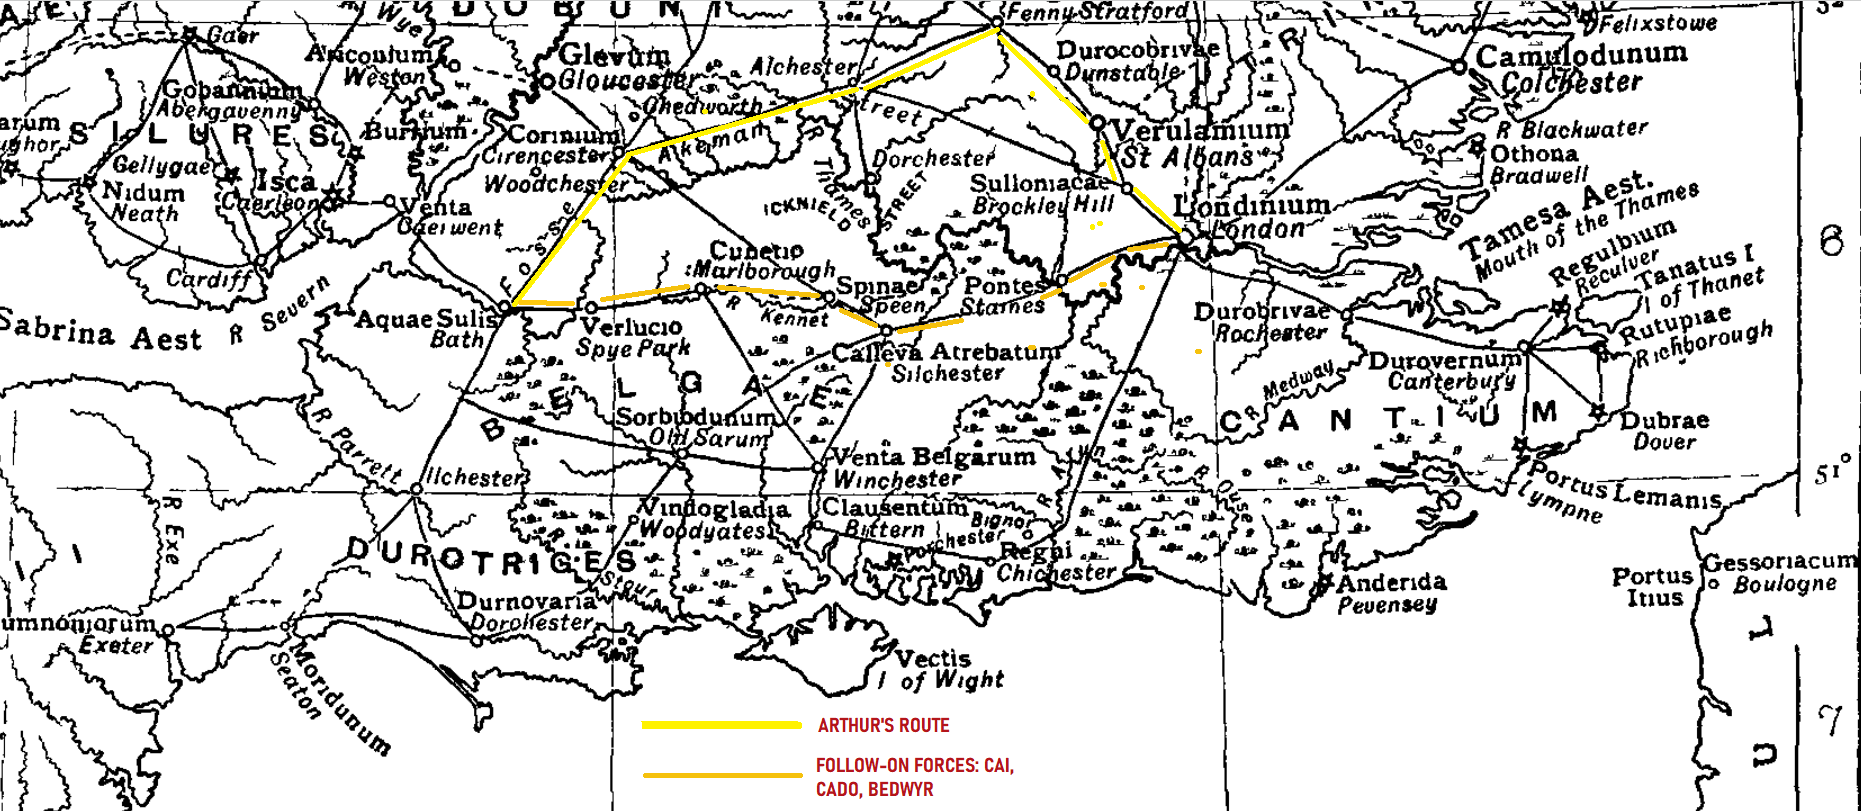
Losing no time, Arthur and his Combrogi (and perhaps some picked mounted men from among the northern petty-kings who owed him favors and allegiance) rode southward post-haste! At a controlled canter, a cavalry force can safely travel 60 miles in a day; and somewhat more if able to change mounts. Arthur’s mailed Combrogi likely rode the largest horses available to a Roman heavy cavalryman (15 – 16 hands); and such horses were in limited supply. This said, if we assume that Arthur’s men were able to change mounts, traveling the excellent paved Roman roads, a week’s hard riding would bring him to Bath.
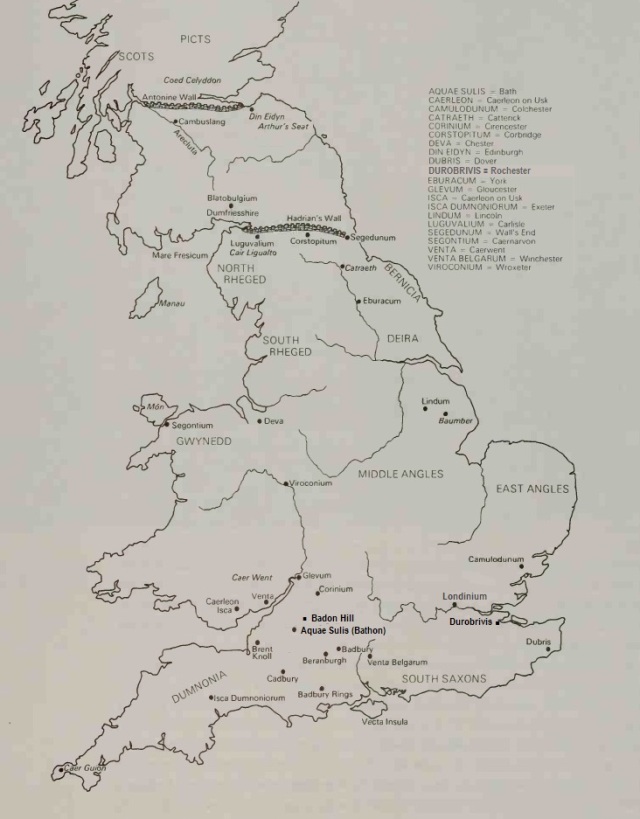
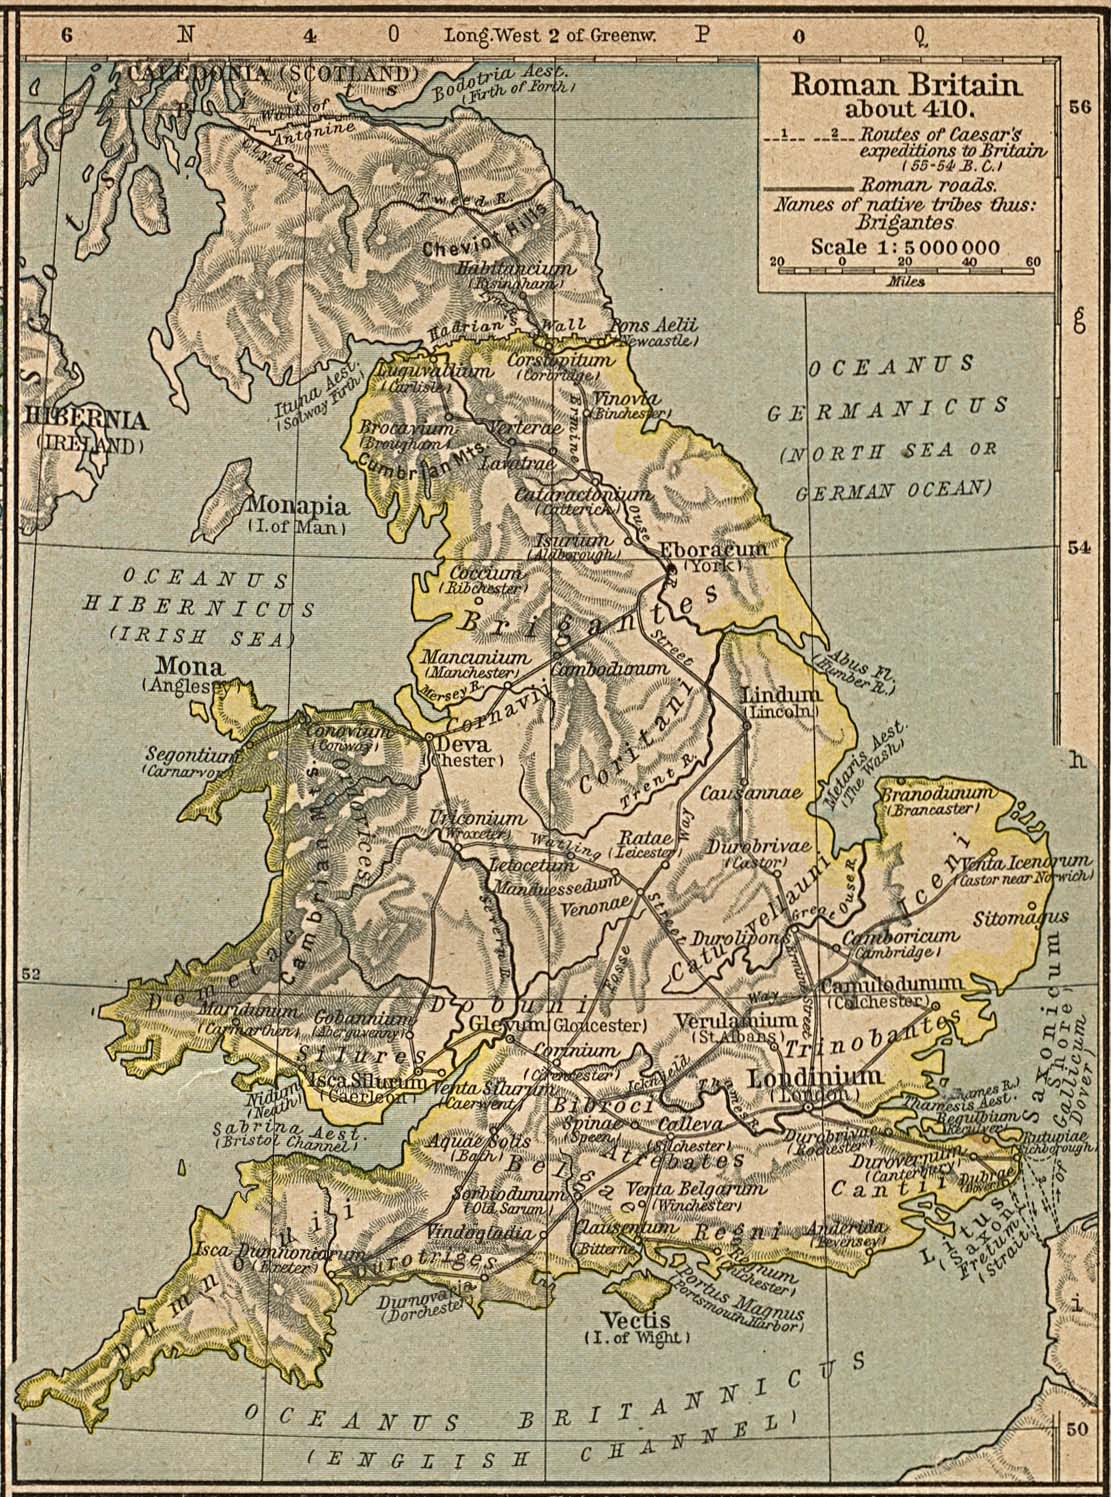
There were roughly two routes by which Arthur could ride south, on either side of the the Pennines, the spine of hills that run through the center of Britain. The likely route he took was the eastern one, which would take him south of the Wall into the British kingdom of Elmet and through Eboracum/York. Following mainly Dere Street as far south as Yorkshire, where it joined the Roman Ridge Road near Eburacum. At modern Templeborough in South Yorkshire, Arthur would have switched to Icknield Street; which finally joined the Fosse Way near modern Bourton-on-the-Water, in Gloustershire.
Now a picturesque Cotswolds town on the River Windrush (“the Venice of the Cotswolds”), in Roman times this was the site of a Roman posting station, and the small village that had grown up around it. From here, Arthur was but 51 miles from his destination. It was here, perhaps, that he received the ominous confirming news: Badon was invested and under siege!
THE SIEGE OF BADON
Ælle and the Anglo-Saxon forces arrived before Badon/Bath in late August. He would have found the countryside deserted, the local Britons having fled the area or taken refuge in the town. As his army moved into position around the place, cutting it off from outside contact, the Bretwalda would have called a war council of his chieftains. Together, they would consider the best way to take the town.
 All Roman cities had defensive walls. The normal pattern was a rectangle, all the streets laid out in a regular grid of right-angle streets. The defenses consisted of a masonry circuit wall supported by towers at regular intervals. In many (but not all) cases, small bolt-throwing machines, scorpions, were mounted upon the towers or walls.
Bath/Badon was no exception.
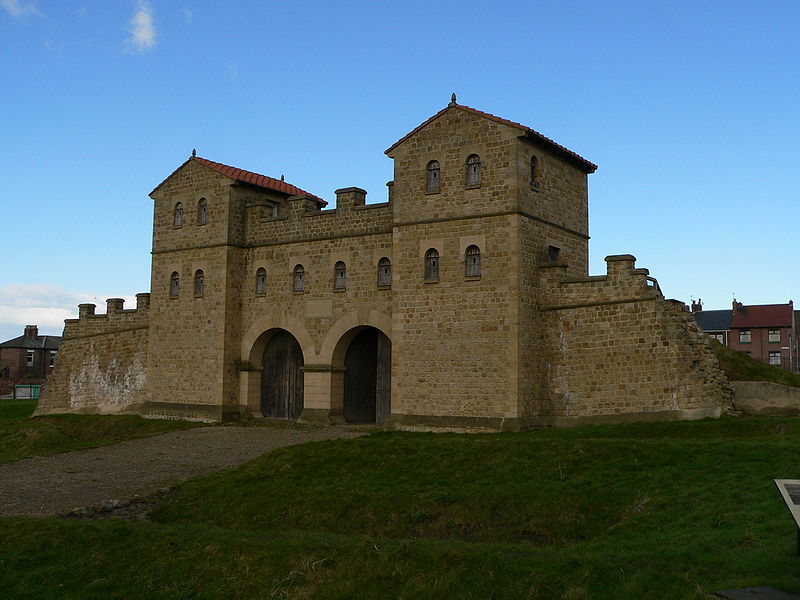 Example of a fortified Roman gateway.

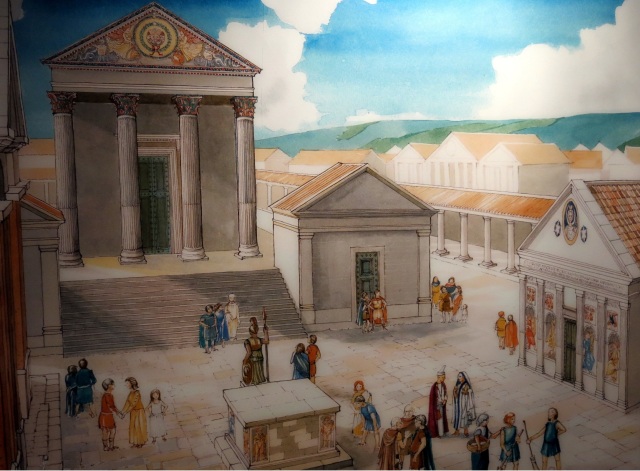
Roman Bath (Badon)
While the Saxons were unsophisticated in the arts of siegecraft (what the Greeks called poliorketica) they had three relatively effective ways of capturing such strong places when necessary.
The first method was merely to surround the town or fort, and prevent the defenders from being resupplied from the outside. Given time, most places could eventually be starved into submission. This tactic, though, was a double-edged sword. The Saxons (like most “barbarian” armies of the Dark Ages) had at best a rudimentary grasp of logistics. A “barbarian” army on campaign lived off pillaging the surrounding countryside. When an area was picked-clean, the army perforce needed to move on or starve (along with the surviving locals). Sitting down to a lengthy siege risked running out of food supplies even sooner than the defenders within the town/fort; who, unless taken completely by surprise or at the end of a long winter, likely had emergency supplies stockpiled for just such occasion. (At Aquae Sulis/Badon the town fathers would have had ample time to lay in supplies in anticipation of Ælle’s coming.) Finally, given the poor hygiene and sanitation of Germanic barbarian armies in general and the Saxons in particular, camp pestilence was an even greater threat than enemy weapons! (It should be remembered that up till the 20th century more soldiers perished on campaign from disease and sickness than from wounds.)
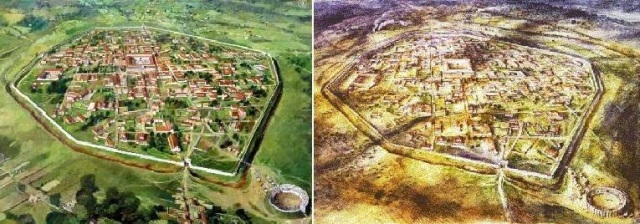
The second way of eliminating a fortified British town or hillfort was simply to occupy the neighborhood near a British town, establishing burhs. From these, the Saxons could harry the countryside, killing or taking-off the peasants who worked the fields that fed the town. The Saxon ceorls would set up their own farms around their burhs, putting British peasants to work as thralls. Meanwhile, these bad neighbors would periodically raid the nearby town and its environs, making normal life so untenable that the town’s citizens would in time move away to more hospitable places (usually to the west). By this tactic many of the towns of Roman Britain had been forced into abandonment or surrender.
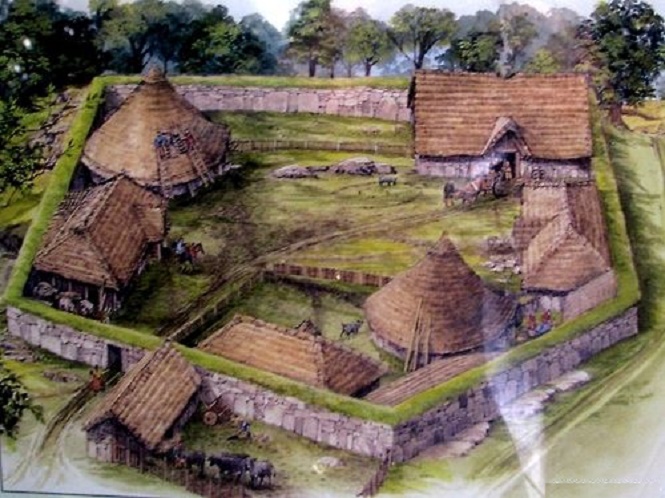 Saxon burh (fortified village)
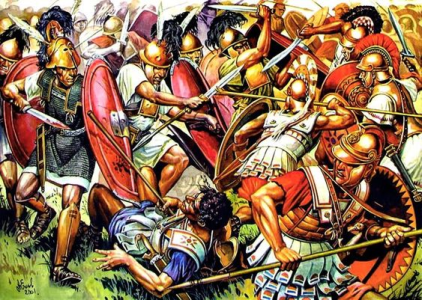
The last resort was simple battery and escalade. Ladders would be set against the circuit wall, and battering ram put to the town’s gate(s). Fierce Saxon warriors would swarm up their ladders, belt-axes or the deadly knives from which their name derived in hand. Man-for-man, these fierce warriors were more than a match for any town burgher or part-time militiaman. And if the gate was battered down, the Saxons would raise their shields overhead and swarm through the gatehouse as arrows, stones, and boiling liquids were hurled down upon them.
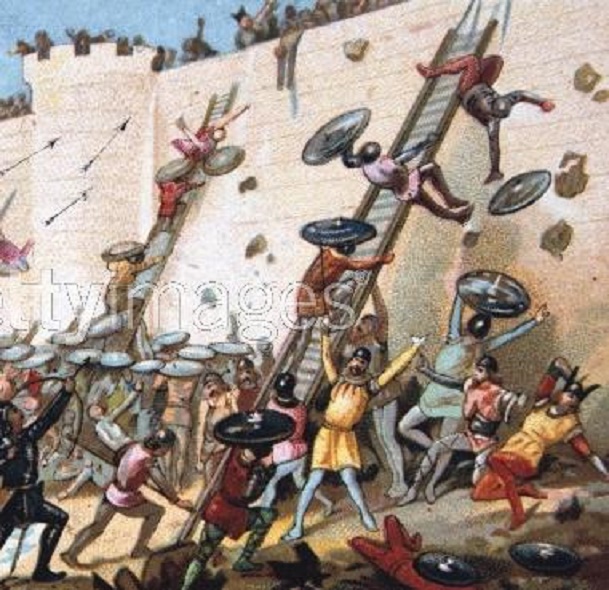 Storming a Roman fortified town in this crude, straight-forward fashion could result in terrible casualties to the attacker. Such a tactic would be used only when no other was available, or time was an issue.
Now, at Badon, time was the issue.
Ælle and his chiefs would know that the “Welsh” must soon react, particularly the nearby petty kings of Dumnonia. We have no idea from the scant accounts of Badon who were defending the place. We can assume the townsmen and perhaps the local militia. But even that much is pure conjecture. It is not unlikely, though, that at least some of these local Dumnonian lords may have rushed trained men of their own “Teulu” (household warriors) into the town at news of the Saxon approach.
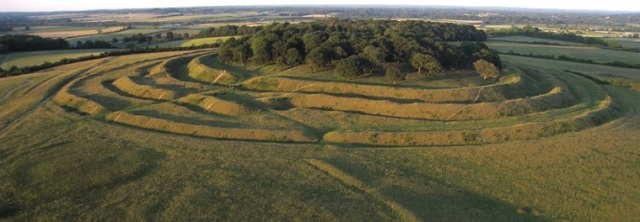
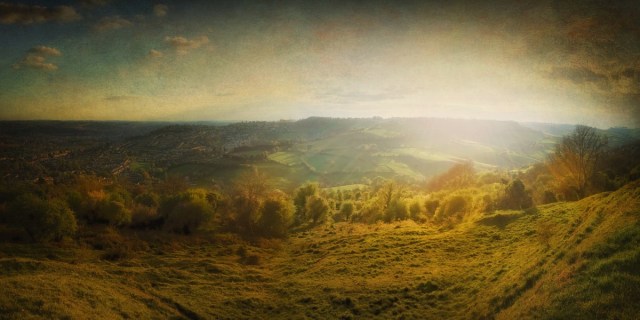
But the full levy of Dumnonia would have been called up, and perhaps mustering at Cadbury Castle hillfort, some 30-plus miles to the south. This ancient Iron Age hillfort had been refortified during this age and was likely the stronghold of a Dumnonian warlord. It would have been a natural place where the semi-professional warbands of the local lords and the militia levy of Dumnonia would gather to prepare for the relief of Badon. Its name comes from its possible founder as a stronghold in the late 5th/early 6th century: Cado. The name Cadbury means “Cado’s Fort”.
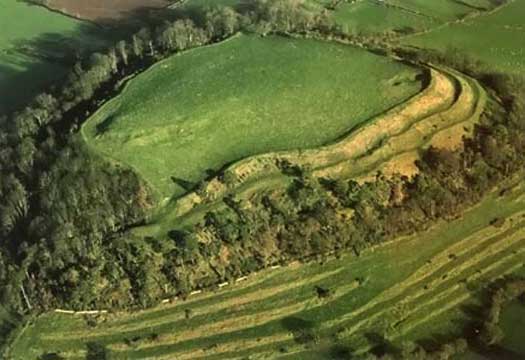 South Cadbury Castle hill fort, Somerset
Geoffrey of Monmouth gives an important role in his account of events to “Duke Cador of Cornwall”. This character may well have been based upon the very real Dumnonian leader, Cado ap Erbin (or ap Geraint or Gerren), petty-king of a region of north Devon and perhaps “High King” of Dumnonia. As with his brother (or possible father) Geraint, he is closely associated with Arthur in the Welsh sources [1]. Both are named in the 6th century elegy on the Battle of Llongborth (describing the battle where Geraint may have been slain) and in the 6th century Life of St. Carantoc. Of all the petty-kings who were contemporaneous of Arthur, these two are the only ones we know for certain by name.
It was Cado/Cato who now likely called up the men of Dumnonia to the relief of Badon. However, the entire levy of Dumnonia would take weeks to fully muster. Time which the defenders of Badon didn’t have.
Ælle was preparing to storm the town, using his massive numerical advantage before succor could arrive from the south or west. The first two days his warriors sat before the town would have been spent in cutting timber for ladders and for a ram. On the third day, these assembled, the Saxons moved into position.
 We can recreate a likely scenario: the Saxons attacked in the early morning, at first light rushing the walls. Some no doubt were cut down by fire from the defenders on high. Once at the base of the fortifications, their ladders were raised, while crude rams hammered at the northern and western portals (the eastern wall was warded by the River Avon). The fighting would have been savage and desperate. Though in such assaults the attacker always took disproportionate casualties until gaining a lodgement atop the walls or breaking in a gate, the shear size of Ælle’s army made the end a foregone conclusion.
Badon seemed doomed.
However, before the Saxons could sweep over the battlements or batter-in the gates, help arrived from a wholly unexpected direction, from the north.
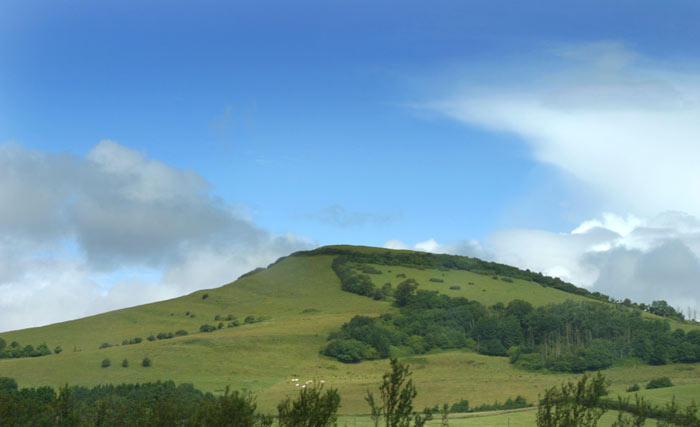
Arthur had arrived at Badon, and the dragon standard waved in the Saxon’s rear, atop Solsbury Hill! Or, as it was known locally, Badon Hill (Mons Badonicus).
Approaching Badon (Bath), Arthur would have come along the Fosse Way as it descended down the ramp-like spur of the Banner Down towards the Avon valley. Turning west off the road, he and his band would have ascended the steep slopes of Badon Hill, known today as Solsbury Hill.
Here were the remnants of an old Iron Age hillfort. From here, Arthur’s few hundred Combrogi could survey the Saxon host below, safe from sudden and overwhelming assault; while in a perfect position to threaten Ælle’s line of communications to the east.

The stage was now set for the Battle of Badon Hill, the last of Nennius 12 Battles of Arthur. But before laying out a plausible description of the battle, let us reexamine the forces and leaders involved.
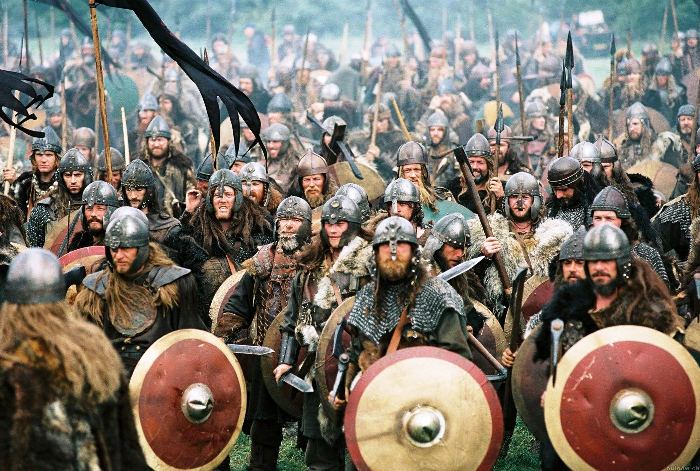
THE SAXONS
According to the Anglo Saxon Chronicle, Ælle was the first king to be called Bretwalda (“Britain Ruler”). While more a “first among equals” than a true king of all the Anglo-Saxons, he likely had the auctoritas to call a great number of the disparate Saxon kings and warlords to his standard when required. The army he brought to Bathon was undoubtedly one which included warbands from all of the Saxon (and possibly Angle) “kingdoms” in Britain. It must have included a great number of the Anglo-Saxon warriors of Britain; in that its defeat proved decisive, stopping (and in fact pushing back) the Saxon advance in Britain for sixty years. Clearly, no small affair.
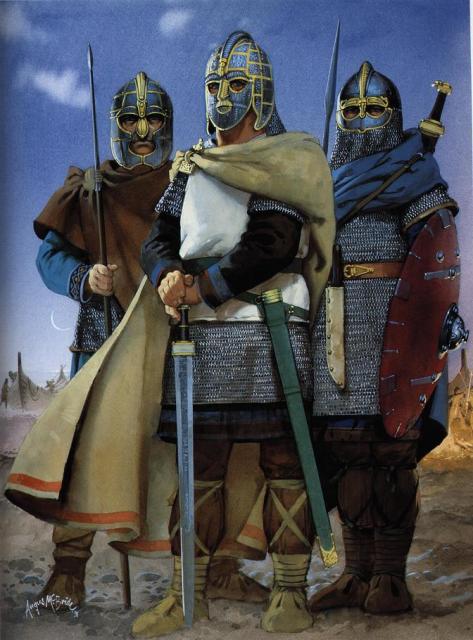
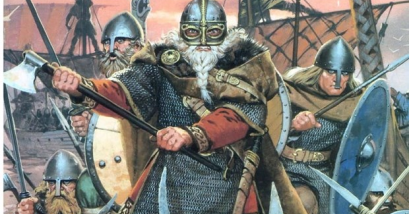
The core of Ælle’s host was composed of the elite warriors of his own household, his gesith (what the Roman writer Tacitus called a “comitatus”). Every Germanic warlord maintained a retinue of young “hearth warriors” who ate, slept, and fought beside him. In peace time he drew from their ranks his trusted officials, who helped him govern his lands. In battle they served as his elite professional frontline troops; the tip of the spear when formed in wedge, or the front ranks of any shieldwall. These pledged men would die before deserting their lord. Ælle’s three sons, Cissa, Cymen and Wlencing likely fought beside their father as well; though the eldest and heir, the Ætheling Cissa, may have had a smaller gesith of his own.
The “gesith” of a great chieftain such as Ælle may have numbered as many as 300 proven warriors. Later Scandinavian kings and jarls maintained such bodyguards, called hirðmenn/hirthmen; their numbers ranging from just thirty to sixty men for a jarl to as many as several thousand for a wealthy and powerful king such as Cnut the Great.[2] Most Anglo-Saxon chieftains in this earlier, poorer period would have had much smaller retinues; perhaps based upon the “keel”, or ship’s crew of between 30 and 60 men.
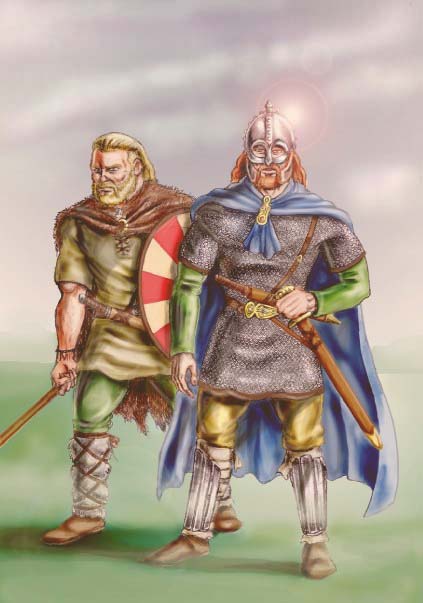
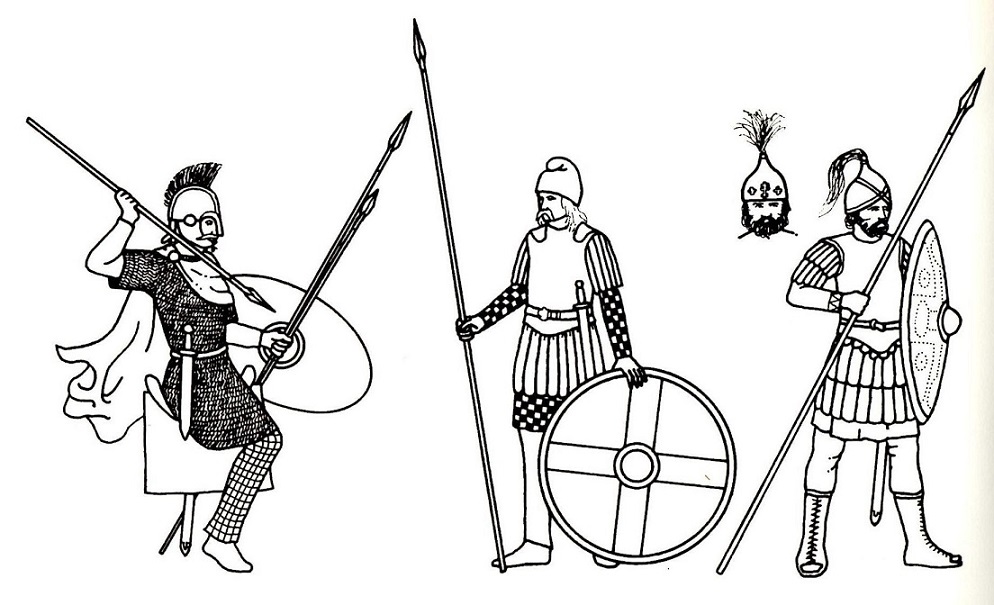
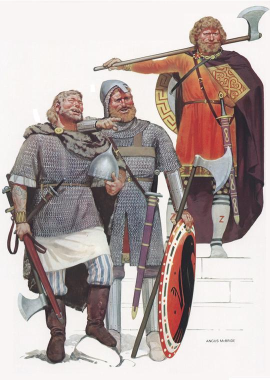
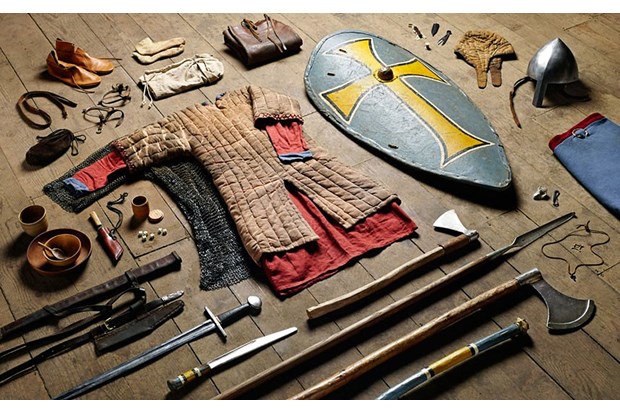
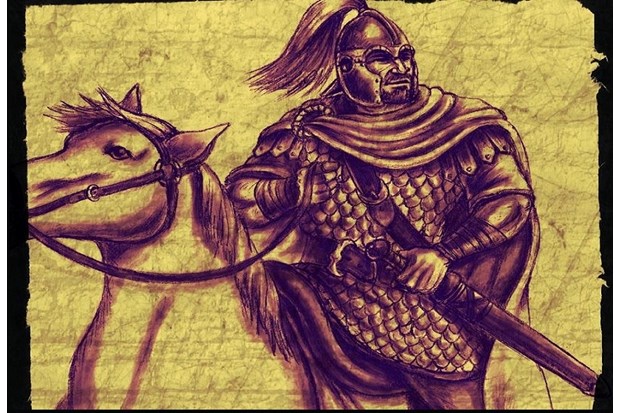
Anglo-Saxon chieftain or member of gesith; and Saxon ceorl. (Art by Jason Pope)
Along with the professional warriors of his household, Ælle would have brought the levy of free-born Saxon farmers (ceorls) of his own realm, Sussex (Kingdom of the South Saxons). In later Anglo-Saxon society, this would be called the fyrd. In these early days of constant raid-and-counter-raid between Saxon and Briton, virtually every able-bodied Saxon male was a warrior. Land and what could be grown or raised upon it was the principal coin of the realm; and would only be given to warriors capable of defending it and supporting their king in time of war. Sussex under Ælle was a dynamic and aggressive newcomer in Britain, born in blood with the sacking of Romano-British Anderitum (Pevensey Castle), traditionally dated 491 [3]. At least some of older warriors in his host may have been veterans of Ælle’s earlier victories over the hated “Welsh”.
Along with his own South Saxons, the horde Ælle brought west to Badon included the men of Kent (Cantaware), led by their own king, Oisc “Big Knife” , son or grandson of the famed Hengist .[4] Geoffrey of Monmouth (hardly a reliable source) names the Saxon leaders as Cheldric, Colgren and Balduph; but these names should be considered mere placeholders for unknown (to him) Anglo-Saxon warlords . From up-and-down the eastern coast of Britain, every Anglo-Saxon pirate, warlord, and petty-king joined Ælle in this great campaign against the Britons.
As described earlier, such an expedition against the “Welsh” would have attracted land-hungry warriors from not only Anglo-Saxon Britain, but from across the North Sea, from the homelands of the Anglo-Saxons as well. Geoffrey of Monmouth speaks of Germans being brought from across the sea to reinforce the Saxon leaders for this campaign. This no doubt reflected the actual arrival of many such “Vikings”, flocking to take part in the despoiling of Britain. As noted earlier, small numbers of Franks, Frisians, Danes, Norse and Gotar (from southern Sweden, remembered in “Beowulf” as the Geats) may have sailed to Britain as well; to take service under the Bretwalda, in anticipation of rich plunder. Dark Age warriors gathered about a successful chieftain’s standard if he showed himself a generous “gift giver”; and land was the most prized reward a chieftain could give to a follower. Much of Ælle’s motivation for making war against the Britons in the west was in fact the need for land to grant the land-hungry new-comers from across the sea that followed his standard.
One question must be asked: was Cerdic, wily leader of the “West Saxons” present?
As outlined earlier, Cerdic is described in these early days of the West Saxon people as an Ealdorman, “Elder Man”[5]. Ealdormen were not independent rulers; but officials answerable to an Anglo-Saxon ruler. As speculated earlier, Cerdic’s master at this stage was likely Ælle of the South Saxons.
As an officer (or vassal) of the Bretwalda, Cerdic would have been expected to answer the summons to war against the Britons. His holdings, within the marshy coastal region of Hampshire, bordered Dumnonia in the west. His warband could either march north to join Ælle’s host as it marched on Badon. Or he could move directly west, by land or sea; harrying the Dumnonian coast, distracting the Dumonians and perhaps delaying their succor of Badon. It is likely that Cerdic did one or the other: merely sitting out the war would have been to defy his master’s summons. Such an act of defiance against the most powerful ruler in Britain on the eve of what promised to be his triumphal final campaign risked not only being left out of the rich booty to be gained, but being branded a rebel against the overlord he served.
So, though we have no way of knowing if Cerdic was present at Badon, his participation in the campaign in some fashion is highly likely. But as part of Ælle’s great host besieging Badon, or as a diversionary force raiding the Dumnonian coast? That Cerdic’s death is recorded as being in 534, nearly two decades after the battle, lends weight to the latter possibility. He clearly survived the battle; unlike so many other Anglo-Saxon’s present.
That Cerdic and the West Saxons warband might have harried the Dumnonian coast as Ælle laid siege to Badon might also explain Geoffrey of Monmouth’s contention that the Saxons came by sea; landing at Totness, near Devon:
“…[the Saxons] went on shore at Totness. No sooner were they landed, than they made an utter devastation of the country…”
Geoffrey (perhaps working from now-lost Welsh or Cornish sources) has the Saxons marching north from Totness to Badon, murdering and pillaging as they went. Could his account come from sources that confused Cerdic’s costal raid with the movement of Ælle’s main host (by land) against Badon? Or, attempting to reconcile the two separate operations, conflates them into one?

In any case, with-or-without Cerdic’s West Saxons, the savage host Ælle brought to Badon was likely the largest ever marshaled by any Anglo-Saxon leader to that date: numbering not less than 3,000 warriors, nor more than 10,000.
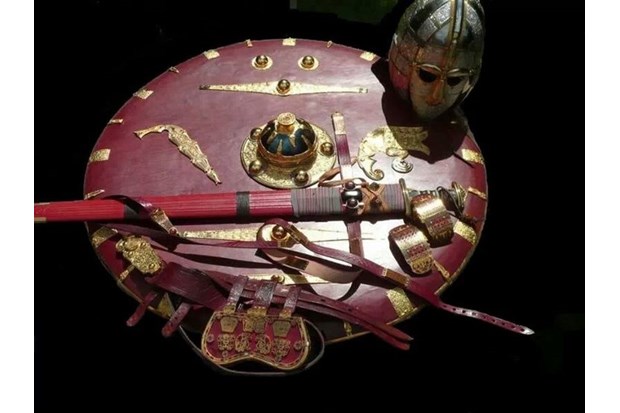
The “Saxon” warriors that followed Ælle would have been equipped with a round shield made of planks of linden wood, covered with tough cowhide; gripped behind a heavy projecting iron boss. His chief weapon would have been either a light spear, useful for throwing or retaining for melee, not dissimilar to the late Roman spiculum. However, both angons (heavy throwing spears) and francisca (throwing axes) have been found in Saxon graves of this period. These were the defining weapons of the Franks; arguing both for Frankish elements in early Saxon warbands, and a cross-pollination of weapons (and techniques) in such a heterogeneous force.

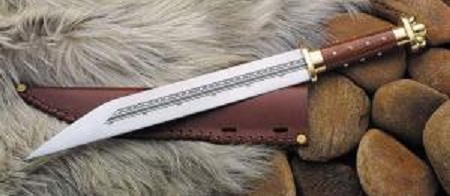
As previously discussed, the hallmark weapon of a Saxon warrior was his seax. This large, single-edged utility knife was ideal for use in the close-quarters battle that resulted when shield-wall met shield-wall, or when men wrested on the ground in a death-grapple. It was also perfect for finishing-off enemy wounded littering a battlefield!
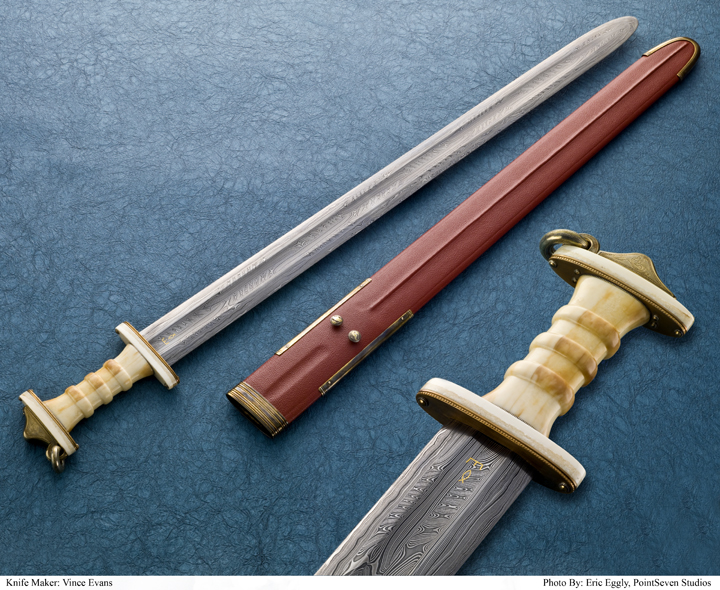
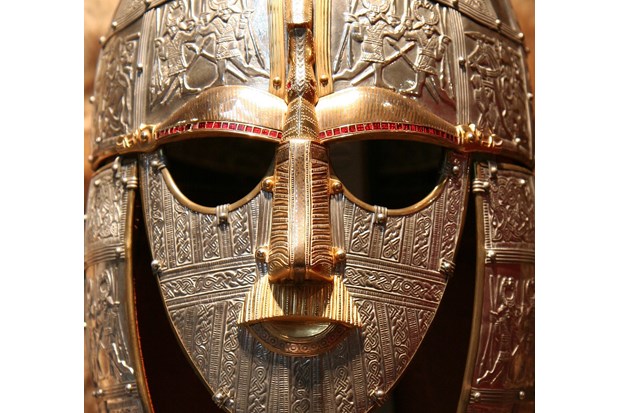
Chieftains and better-armed warriors would also carry a broadsword, the favorite weapon of the noble Germanic warrior. By the 4th century, the common sword of all Roman soldiers had become the “spatha”; the proto-broadsword formerly used only by cavalrymen. Such weapons would be re-hilted and highly decorated when captured or acquired by Anglo-Saxon warriors (as would other pieces of Roman armor, such as helms). Such weapons transferred high status to a warrior in Germanic/Scandinavian society; and were imbued with mythic/magical properties. Famous heroes carried famous swords, which bore names of their own: Sigurd the Dragonslayer bore Gram (“wrath”), and Beowulf the sword Hrunting (“roarer”). Later Viking-Age Scandinavian swords bore names like “Leg-biter”, “Skull-splitter”, and “Peace-Breaker”.

Replica based upon Sutton Hoo sword, now in British Museum
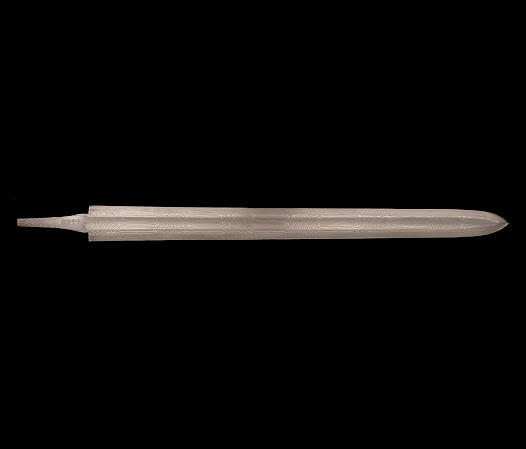
Poorer warriors might carry a scramsax, a longer version of the seax.
Mail shirts, called byrnies, were also items of high status, and confined to chieftains or the wealthiest of warriors. After victorious battles against the Romans or Romano-British, mail shirts might be scavenged. But these were in short supply even amongst the British, likely only found in officers and elite cavalry units.
Battles between Germanic/Scandinavian armies started with both sides taunting each other from afar. Champions would sometimes step-out between the two sides, and challenge the enemy to meet them in single combat. Warriors would recite their noble pedigree, the deeds of their ancestors as well as their own. Far from being considered boorish, bragging was encouraged in Germanic society. A warrior won status (“word fame”) by victory in such duels, in full sight of his leader and his peers, particularly against notable enemy champions.
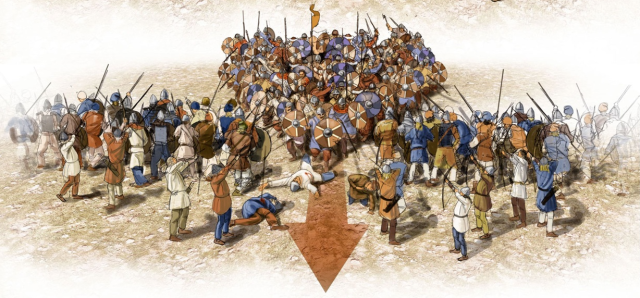
In battle the Saxon host would form up in one-of-two formations: either the shield-wall, a linear formation in which the warriors of the first rank overlapped their shields, forming a wall. Or, when on the attack, the “swine array” (called the “cuneus” by the Romans the) could be adopted. In this formation, the chieftain and his household warriors formed a wedge, and would attempt to penetrate and shatter an opposing enemy line.

Once the battle began in earnest, the Saxon shieldburg or swine array advanced rapidly toward the enemy. As the distance closed to a dozen yards, those armed with throwing spears or axes would hurl these at their opponents. Then, before the enemy could recover from this barrage, the Saxons would charge forward, smashing bodily into the enemy.
A clash between opposing shieldwalls was a brutal slugfest, fought at close range, striking at the enemy from over the top (or underneath of) the warrior’s shields. It continued till one side began to give way, and eventually broke into panicked flight. In swine array, the warband would try to shatter the enemy shieldwall, penetrating and breaking the enemy line.
THE BRITONS
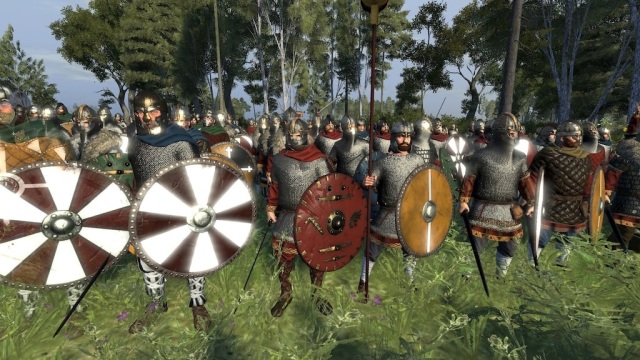
The British warriors who fought at Badon had come to call themselves Combrogi (or Cymry), meaning “fellow-countrymen” or “comrades”. The term “Welsh” (meaning “ foreigner”) would have been insulting to these native British warriors.
The memory of Rome was distant, though reflected in their military organization and equipment. The bulk of the army was comprised of spear-armed infantry pedyt (from the Latin pedites, or “foot”). These were militia, part-time soldiers; drawn from the farms, towns and fortress garrisons. They were likely organized in “legions” of 1,000-1,200 men each, approximately the same size and structure of legions of the late Roman army. Supporting this assumption is one version of the Anglo-Saxon Chronicle, which describes the 4,000 British casualties at the Battle of Creacanford as compose of “four troops”. A smaller unit, called a “cant” (likely a derivation of the Roman centuriae), consisted of 100 men; suggesting a “legion” of spearmen divided into ten cants, as with the late Roman legio.
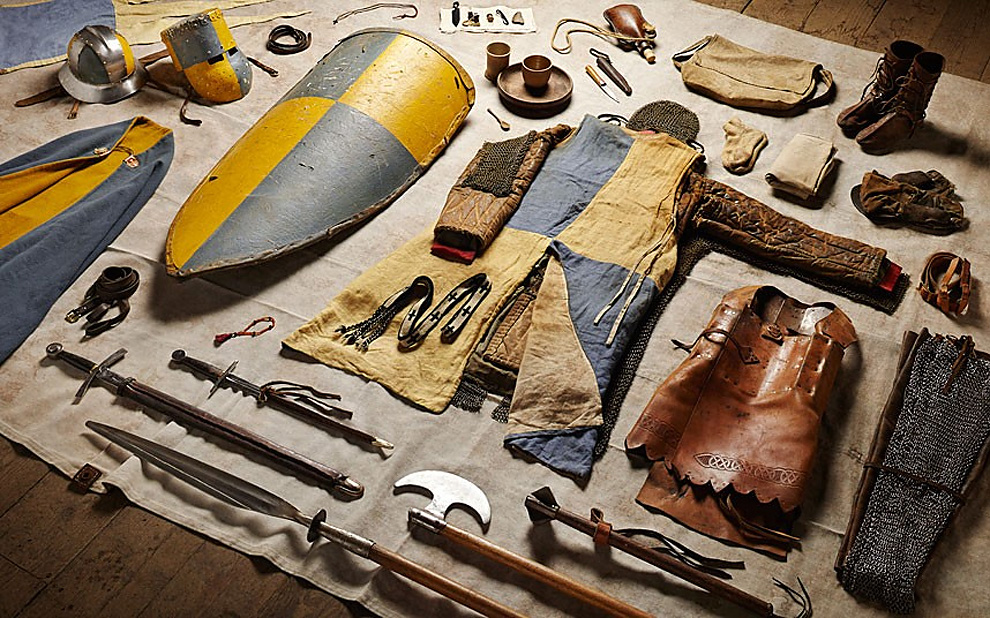
Sub-Roman British warriors
As was the practice with the late Romans, a small number of every legio might have been armed with bows, instead of the usual lancea (light spear) or spiculum (heavy throwing spear/javelin). Auxilia cohorts of archers (sagittarii) also existed; and Britons may have continued both of these traditions into the 6th century.
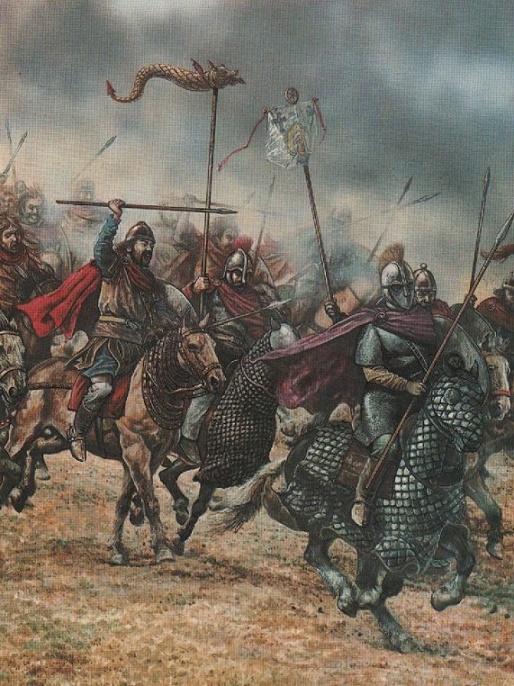
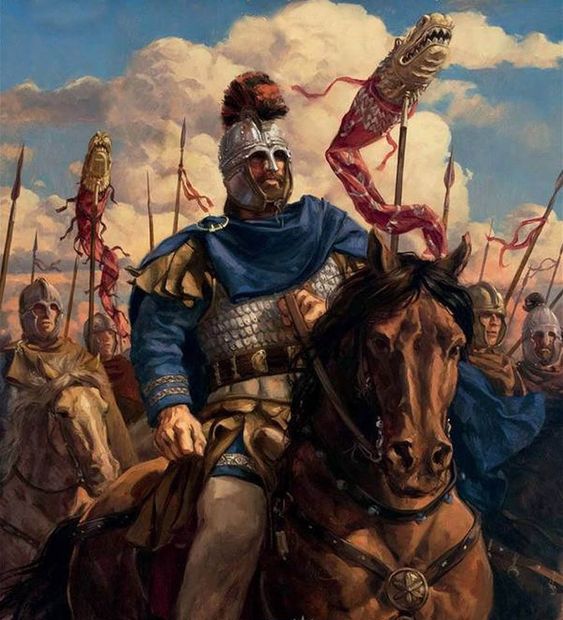
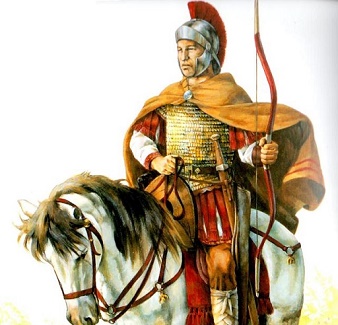
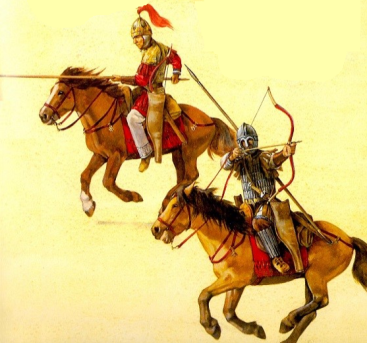
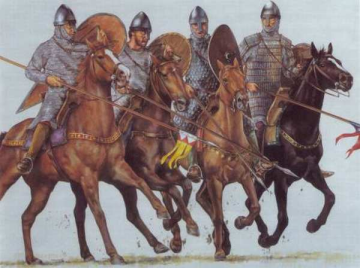
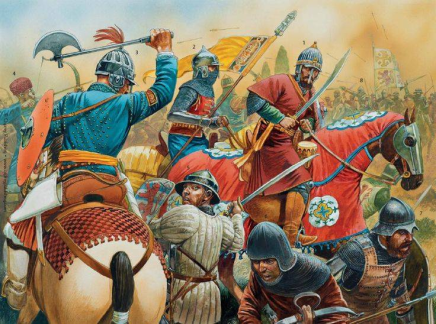
The elite “professionals” of a British army were the cavalry retinues of the nobles, called teulu, or “family”. Despite their name, these were picked men from both the noble’s own tribe and, in the case of great warlords, adventurers from other lands. In this respect they were very similar to the late Roman Bucellarii. These wore mail shirts and helmets of late Roman pattern; and fought with spear/javelin and sword. However, the Romans had settled large numbers of Sarmatian heavy lancers in northern Britain. Their “horse culture” had permeated throughout the native Celtic aristocracy. As discussed previously, it is possible these and Alani cavalry settled in Armorica (Brittany) by the great Roman commander, Flavius Aetius[6], provided Arthur (and Ambrosius Aurelianus before him) with a Teulu of Sarmatian-type heavy cavalry lancers.
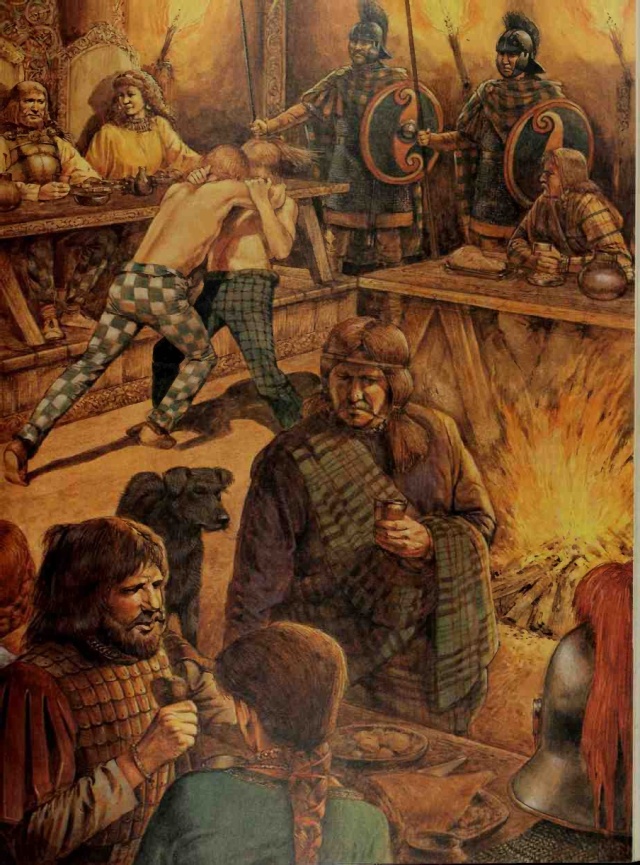
A sub-Roman Celtic lord dines in his hall, the soldiers of his teulu standing guard in the background
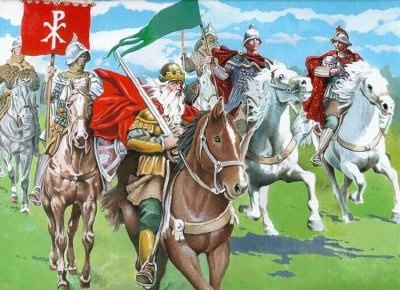
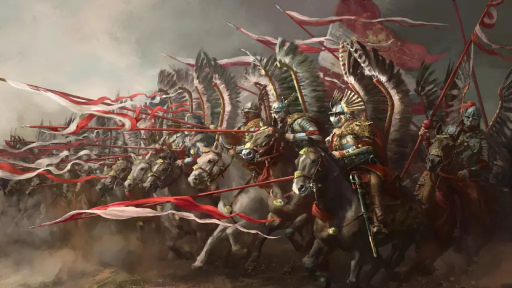
The cavalry force that Arthur brought from the north to Badon likely numbered not less than 300, nor more than 1,000. As suggested earlier, the Combrogi of Arthur’s own teulu likely numbered around 300 at full strength. This was a standard establishment for late Roman cavalry units, called vexillatio. Contemporary Byzantine/Eastern Roman practice at the time was unchanged, though the late Roman 300-man vexillations were now called bandon.
We have postulated here earlier that Arthur’s own teulu was of the heavy lance-armed Sarmatian/Alani type; known in the late Roman army as cataphractarii. Their role in the Roman army was both to protect the flank of the main infantry line in battle; and to provide a powerful shock weapon capable of breaking enemy formations. Such regiments of Roman cavalry were often armored in bronze and iron, sometimes including the horse as well as the man. Arthur’s Combrogi were likely more lightly armored: Britain in the late 5th century/early 6th century lacked the financial resources available to the Romans. A typical Arthurian teulu horseman was likely equipped with iron mail or scale shirt, augmented perhaps by banded (or splint) armor on all or part of their arms and legs. An iron helmet of the late Roman type, likely sporting a crest or horse-tail, protected their heads.
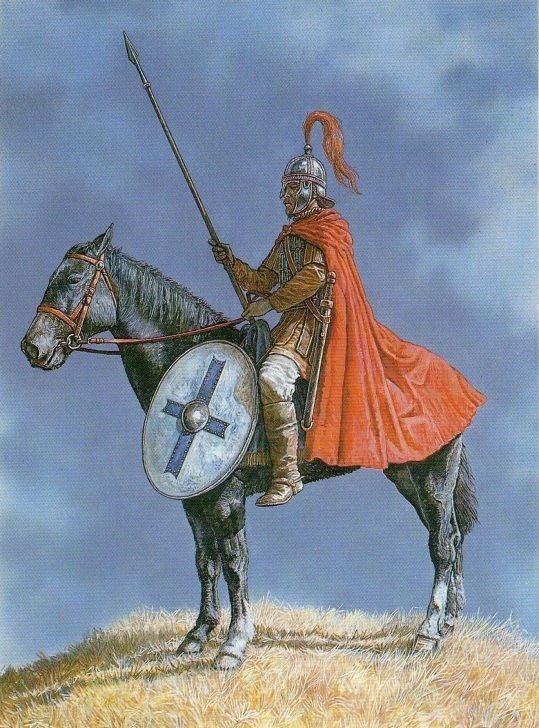
Their chief weapon was a lance or spear. This could have been either the two-handed, 12’-long kontos normally carried by Sarmatian-style lancers; or, alternatively, the combination of shield and a shorter, lighter single-handed spear. Arthur is many times mentioned as carrying a shield in battle, which would suggest the latter. A military cloak would add a jaunty completeness to his panoply.
Along with the Combrogi of his own teulu, Arthur may have collected along the way south the teulu’s of other British leaders. These would have been lighter than his own, but still very useful in battle against the Saxons, who had no cavalry. These could make good the losses and attrition among his own Combrogi in the previous years of campaigning.
THE BATTLE OF BADON HILL
For Ælle, Arthur’s sudden arrival must have come as an unpleasant shock. The Bretwalda would have heard that Arthur and his vaunted horsemen were in the north, supposedly too far away to interfere with his move against Badon (Bath); the keystone to his strategy aimed at driving a wedge between the northern and southern British kingdoms. Now Arthur was on the high ground behind the Saxon army, dominating Ælle’s line of communications. Strategically, it was an unacceptable situation for the Saxon warlord.
Ælle’s reaction was likely to have pulled back from the bloody, all-out assault on Badon’s walls, and to regroup his warriors to face the new threat. Arthur’s arrival had given the defenders of Aquae Sulis a much needed respite.
Likely leaving a portion of his forces to maintain the blockade of Badon town (perhaps King Oisc “Big Knife”, and his Kentish warriors), Ælle now moved his main force northeast, against Arthur on Badon Hill.

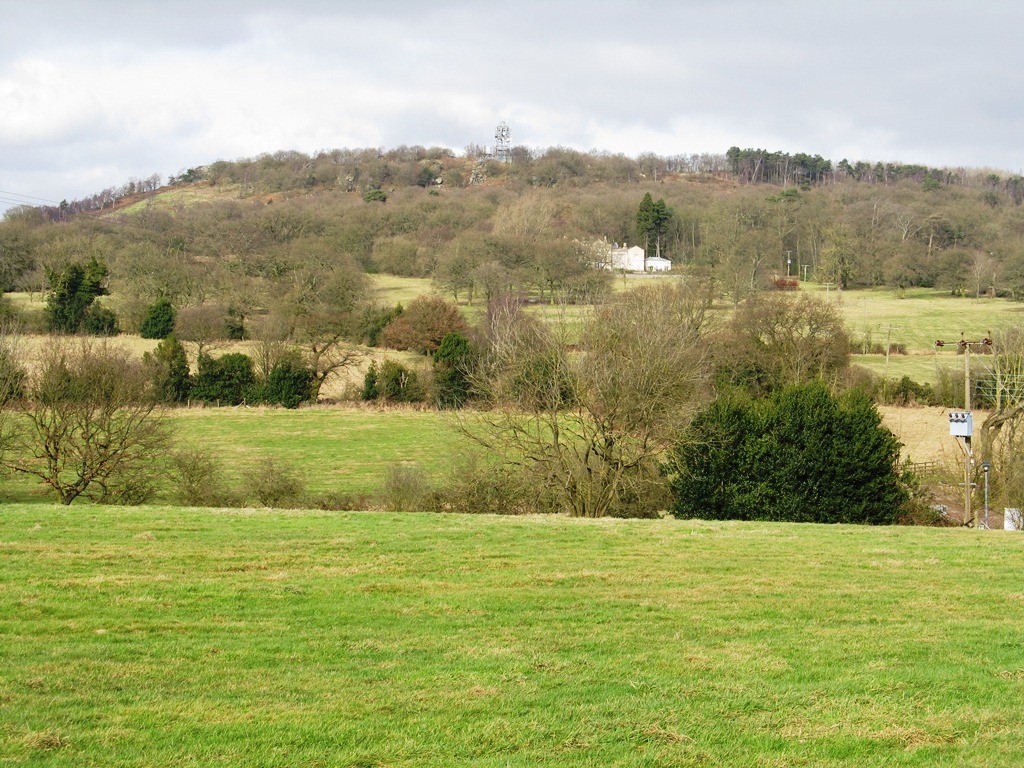
Bath (Badon) viewed from Solsbury Hill: from this vantage Arthur would have surveyed the siege of Badon/Aquae Sulis
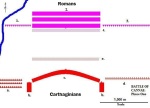
Attacking uphill against a force of heavy cavalry capable of charging down at any moment was a dangerous proposition. The only way infantry can resist a charge of heavy horsemen is to maintain close-ranks, and hold steady against the horsemen’s terrible impact. This is made doubly hard by the added impetus a downward slope gives to a charging horseman and the already considerable weight of his mount (a 15 hand horse weighs in around 1,100 lbs); and for a large infantry force, keeping good order while advancing in line uphill is problematic under the best circumstances.
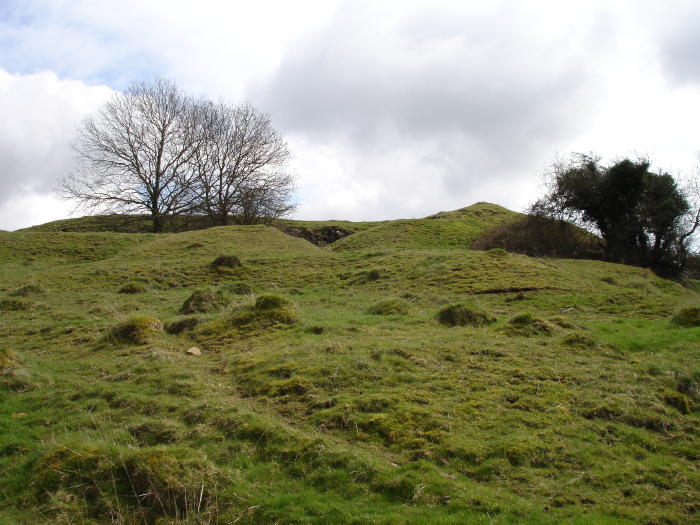
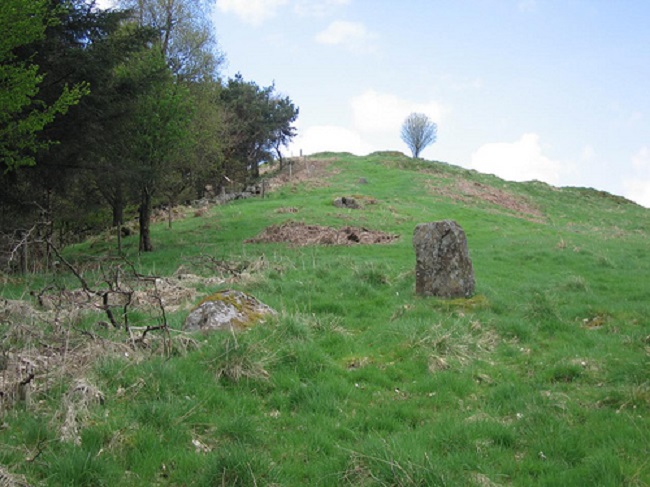
Slope of Solsbury/Badon Hill
Cognizant of all this, Ælle may well have halted his forces at the foot of the hill, and mulled over the best way to dislodge Arthur from atop the hill.
The Annales Cambriae say that Arthur fought at Badon carrying “the cross of our Lord Jesus Christ on his shoulders for three days and three nights…” This entry suggests a battle (or, as Gildas describes it, an “obsessio“: a siege) lasting three days; and that Arthur bore the symbol of a cross painted on his shield. But if Badon was indeed a three days long battle, that time period might well have begun with Ælle arriving and laying siege to the town of Badon; which would also explain why Gildas refers to Badon as a siege.
Alternatively, Arthur might have camped atop Badon Hill for three days, surrounded, while Ælle considered the best way to attack him.
We know the end, but we can only guess at the details of the battle. Elaborating on the scenario we have presented, a plausible narrative of this decisive battle of the Saxon wars unfolds:
Thirty miles to the south Cado/Cato, the Dumnonian warlord whom Geoffrey of Monmouth calls “Cador, Duke of Cornwall”, is mustering the levy of Dumnonia at the refortified Iron Age hillfort, known today as Cadbury Castle. From Cadbury he can both keep an eye on Cerdic’s threatening activities, and be in place to support Badon. Now word reaches his headquarters of Arthur’s coming. It is time to move! The threat from the West Saxon’s is imminent; but events at Badon have moved quickly, and Cerdic can be dealt with another day. Cado breaks camp and marches north with whatever forces he has had time to gather to relieve Badon.
Cadbury Castle hillfort is but a day’s hard march from Badon. Ælle’s hand is forced: as to wait another day will find his forces caught between Cado’s army coming from the south and Arthur’s small but deadly band atop Badon Hill to the north. He must seize the initiative, and clear Arthur away from his line of supply (and, in the worst case, his retreat). With his rear thus secured, the Bretwalda can reunite his forces at Badon and face Cado’s Dumnonians in battle. The Bretwalda orders his warriors to assault the heights.
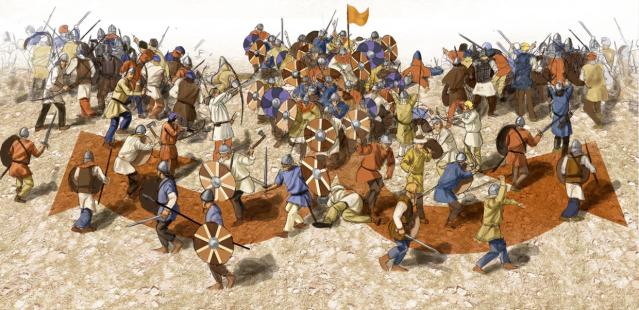
We can picture the Saxons forming a long and fairly thick line, many ranks deep; advancing slowly up steep sides of Mons Badonicus. Their leather-covered shields are brightly painted, and a variety of standards wave above the contingent warbands. The hill is much wider at its base, and as the Saxons climb higher up the slopes their ranks must contract; causing disorder as men jostle each other for space. The grass is bright with morning dew, or perhaps dampened by a pre-dawn downpour, common in the West Country summers. This makes the grass slippery under their feet, and the maintenance of well-ordered ranks nearly impossible.
Above, poised like an eagles ready to strike, are Arthur and his armored Combrogi. His men have tightened their saddle girths, mounted their horses, loosened their swords in scabbards, adjusted shields on arms and grip lances in hand. Their steed’s snorting breath is perhaps the only sound atop Badon Hill; or, alternately, they break into a battle song: these are the forefathers of the Welsh, after all, the sonorous singers of the Celtic race.
As the Saxons draw ever nearer, Arthur watches keenly, waiting for the moment. Like all great captains of war, he possesses the coup d’oeil, the ability to take in at a glance the situation and find the fatal weakness in the enemy’s movements. He sees that the closer the Saxons come up the slope, the more ragged grows their formation, the more winded their rank-and-file.
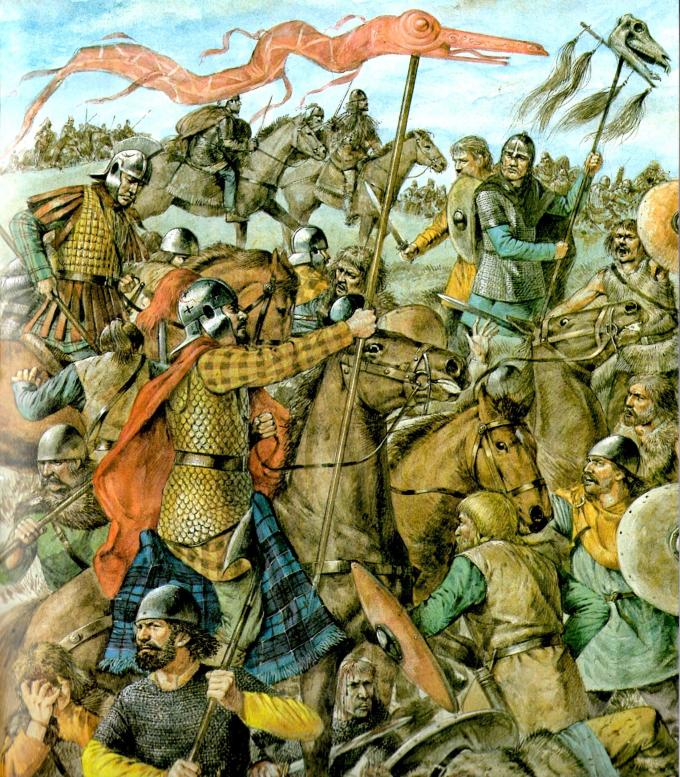
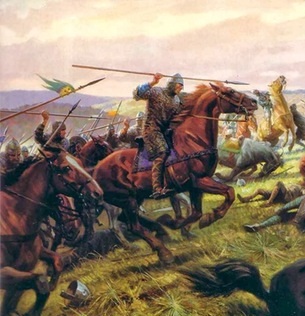
The moment comes: Turning to his signaler, Arthur nods. The trooper raises horn to lips, and its high keening trill sounds atop Badon Hill. Shouting their battle cry, the Combrogi spur forward, over the lip of the hill, and down the steep slope in a glittering, thunderous charge!

They form a mighty wedge, with Arthur and his chief champions, Cei the Tall and Bedwyr “of the Perfect Sinews”, at its point. Deep into the faltering Saxon ranks they plunge, stabbing and skewering, spears and lances piercing the mail byrnies of Saxon chieftains and champions like tissue paper! The Saxon shieldwall shatters, and in moments Ælle’s host is broken and fleeing back down the hill in panic.
What followed was bloody pursuit, and for Arthur’s victorious Britons a lifetime of vendetta and blood debt was paid back with interest!
Heavy was he in his vengeance;
Terrible was his fighting…
They fell by the hundred!
Nennius tells us of Arthur’s final victory at Badon:
“… in it nine hundred and sixty (Saxon) men fell in one day, from a single charge of Arthur’s, and no-one lay them low save he alone.”
We should not take this to imply that Arthur personally slew 960 Saxons; but that the charge of his Combrogi did such slaughter, and that no other warlord or king could claim the credit but he.
Likely the aged Ælle was among those who fell in this initial charge: Arthur would have aimed his attack, like a thrown javelin, straight at the heart of the Saxon horde; where the Bretwalda’s standard stood high. Their king dead, his sons and best men slain around him, the bonds of oath and allegiance that held this savage horde together were sundered. What moments before had been a conquering army was now a rabble fleeing in blind terror! Close on their heels were Arthur and his ravaging Combrogi, their spitting spears and reddened swords rising and falling, cutting men down like ripe corn.
Nennius tells us of Arthur’s final victory at Badon:
“… in it nine hundred and sixty (Saxon) men fell in one day, from a single charge of Arthur’s, and no-one lay them low save he alone.”
We should not take this to imply that Arthur personally slew 960 Saxons; but that the charge of his Combrogi did such slaughter; and that no other warlord or king could claim the credit but he.
Likely the aged Ælle was among those who fell in this initial charge: Arthur would have aimed his attack, like a thrown javelin, straight at the heart of the Saxon horde; where the Bretwalda’s standard stood high. Their king dead, his sons and best men slain around him, the bonds of oath and allegiance that held this savage horde together were sundered. What moments before had been a conquering army was now a rabble fleeing in blind terror! Close on their heels were Arthur and his ravaging Combrogi, their spitting spears and reddened swords rising and falling, cutting men down like ripe corn.
Two miles to the southwest, Oisc “Big Knife” and his Kentish men were camped about beleaguered Badon town. Perhaps Oisc attempted to wheel his men north to rally their fleeing comrades. If so, in this they failed. Or perhaps, as Geoffrey of Monmouth implies, Cado arrived from the southwest and took a significant part in the battle by falling upon the flank of Oisc’s men. These, too, now fled the scene of slaughter!
But fleeing to safety was no easy matter. The Saxons were far from home, penned-in between Cado and Badon to the south and west; the river Avon to the east and south; and Arthur’s horsemen now hunting men down on the flat ground at the base of Badon Hill. In the narrow choke-point between the bend of the Avon and Badon Hill, clogged with fleeing Saxons, the slaughter and carnage must have been terrible indeed. It was here that a generation of Anglo-Saxon leaders and warriors perished.
That Oisc son of Hengist too was slain (likely in the pursuit that followed) is conjecture. But his death at around the same time as Badon makes it likely. Alternately, he may have lived to return to his stronghold at Cantwareburh (Canterbury), only to die soon after of his wounds; or perhaps of a broken heart.
Two miles to the southwest, Oisc “Big Knife” and his Kentish men were camped about beleaguered Badon town. Perhaps Oisc attempted to wheel his men north to rally their fleeing comrades. If so, in this they failed. Or perhaps, as Geoffrey of Monmouth implies, Cado arrived from the southwest and took a significant part in the battle by falling upon the flank of Oisc’s men. These, too, now fled the scene of slaughter.
But fleeing to safety was no easy matter. The Saxons were far from home, penned-in between Cado and Badon to the south and west; the river Avon to the east and south; and Arthur’s horsemen now hunting men down on the flat ground at the base of Badon Hill. In the narrow choke-point between the bend of the Avon and Badon Hill, clogged with fleeing Saxons, the slaughter and carnage must have been terrible indeed. It was here that a generation of Anglo-Saxon leaders and warriors perished.
That Oisc son of Hengist too was slain (likely in the pursuit that followed) is conjecture. But his death at around the same time as Badon makes it likely. Alternately, he may have lived to return to his stronghold at Cantwareburh (Canterbury), only to die soon after of his wounds; or perhaps of a broken heart.
 Ælle, first Bretwalda of Anglo-Saxon England, almost certainly died at Badon. His sons likely perished there as well: his house went extinct after this period, leaving no trace (though later Medieval writers attempted to fill in the gap in the Sussex royal line by assuming Cissa survived and ruled another 90 years!).
Gildas writes that Badon resulted in ‘the last great slaughter’ of the Saxon invaders by the Britons. It ended the long period of violent warfare that had begun when Hengist and Horsa led their Saxon feoderatii against their employer, Vortigern, in the 450s. According to Gildas, the consequences of Badon were that the Anglo-Saxon expansion was stopped and thrown back; and up to the time of his writing, some 30 years later, the Saxons were still dwelling quietly along the eastern fringes of Britain. Modern archeology confirms this: Anglo-Saxon grave sites retreat after Badon; and much of the “lost lands of Lloegyr” were recovered for a time.
Another side-effect of Badon was to elevate the wiley Cerdic from Ealdorman to king. Following the defeat and death of his overlord at Badon, Cerdic returnsf to the marshy coastal fastness of Hampshire. In 519, with his erstwhile master Ælle now out of the picture, Cerdic declared himself King of the West Saxons. His was a dynasty that would last through the centuries, leading to Alfred the Great and his son and grandson, Edward and Athelstan; who together succeeded in uniting England as one kingdom in the 10th century.
Had he been at Badon, Cerdic would likely have faced the same fate as his master, Ælle. The future of Anglo-Saxon England might have been very different, indeed.
For Arthur, Badon was the ultimate triumph. It represented the high-water point of his military career. His days as Dux Bellorum, the war leader of the Britons, had come to an end. A golden age of peace lay before him and Britain, and a new title: amerawder, “imperator”: the Emperor Arthur!
———————————————-
Notes:
- Castleden, Rodney, “King Arthur: the Truth Behind the Legend”, Routledge 2000, P. 114
- See Elite Warriors of the Dark Ages: Anglo-Saxon Huscarl. The origin of the this body of elite household troops was in the reign of Cnut the Great. In all but name, these huscarls were the same institution as the earlier Germanic gesith.
- The Anglo-Saxon Chronicle states that Ælle and his sons landed in Britain in 477; and that he sacked the British settlement/fortress of Anderitum/Pevensey in 491. This is also the date given for the founding of Sussex. But recent scholars debate these dates, some suggesting that due to a dating error by Gildas the traditional Anglo-Saxon Chronicle date may be off by 20 years. This theory would place the sack of Anderitum by Ælle and the founding of the Kingdom of Sussex not in 491, but in 471. Lyne, Malcolm: Excavations at Pevensey Castle, 1936 to 1964, (2009); Archaeopress.
- Alternate sources call him “Octha of the Bloody Knife“.
- Myres, J.N.L. (1989) The English Settlements. Oxford University Press, pp. 146–147
- Bernard S. Bachrach, “The Origin of Armorican Chivalry”: Technology and Culture 10.2 (April 1969), pp. 166–171

 Deadliest Blogger’s historical articles organized in a chronological order, to help my readers place them in some sort of historical timeline.
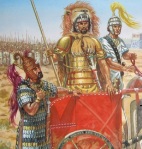 The Artwork of War – Heroes of Troy and Mycenae:
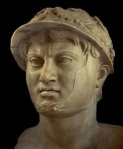 The 25 Greatest Commanders of the Ancient World:
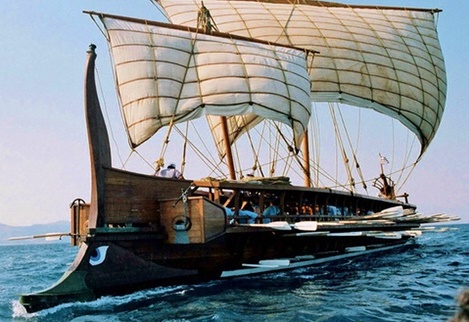 Great Warships of History: The Greek Trireme:
 The Lion at the Hot Gates: Thermopylae 480 BC
 Greece is Save By Its Wooden Walls:
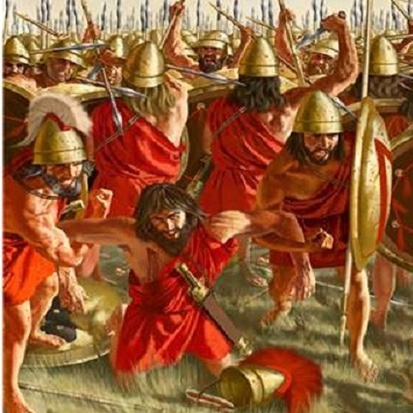 Spartan Invincibility is Destroyed at Leuctra:
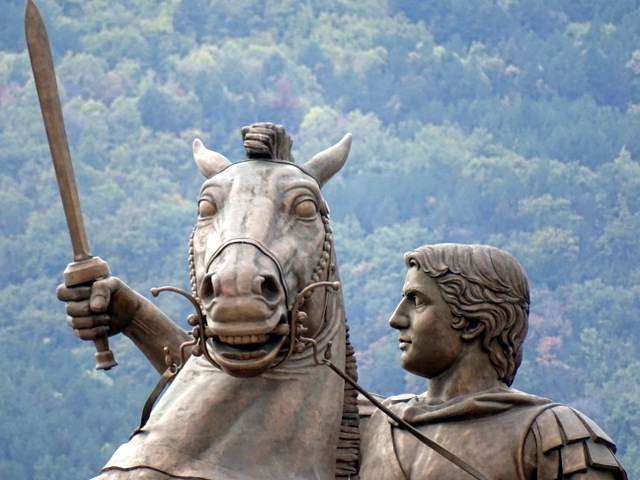
 Great Captains: Alexander the Great:
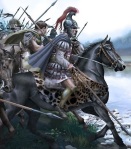 Granicus: Alexander Takes the First Step Toward Greatness:
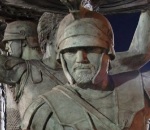 Diadochi: Macedonian Game of Thrones:
 Armies of the Successors: The Antigonids:
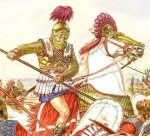 Armies of the Successors: The Seleucids:
 Armies of the Successors: The Ptolemies:
 Great Captains: Hannibal Barca:
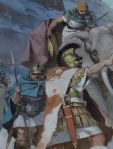
 Cannae: Hannibal’s Masterpiece:
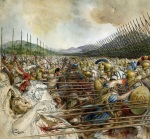 Phalanx vs Legion: Closing the Debate:
 Mad Kings and Maccabees: the First Hanukkah:
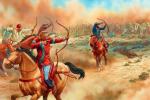 Disaster In the Desert: Crassus at Carrhae:
 Great Captains: Julius Caesar:
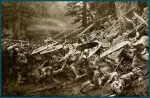 Terror in the Teutoburg Forest!
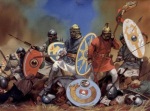 Adrianople: Twilight of the Legions:
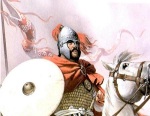 The Age of Arthur
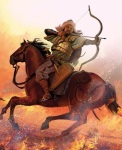 Attila is Stopped at the Catalaunian Fields:
 Dark Ages Elite: The Bucellarii of Belisarius:
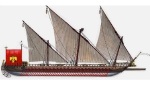 Great Warships of History: Byzantine Fire Dromon:
 Dark Ages Elite: Caballarii of Charlemagne:
 The Vikings: An Enduring Fascination:
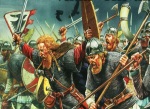 England is Born at Bloody Brunanburh:
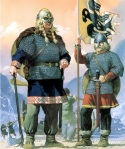 Dark Ages Elite: The Jomsvikings:
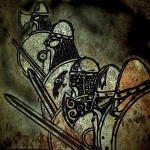 Carnage at Clontarf: Ireland’s Darkest Day:
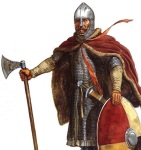
 Elite Warriors of the Dark Ages: Norman Knight:
 1066: A Bloody and Momentous Year
 Elite Warriors of the Dark Ages: Varangian Guard:
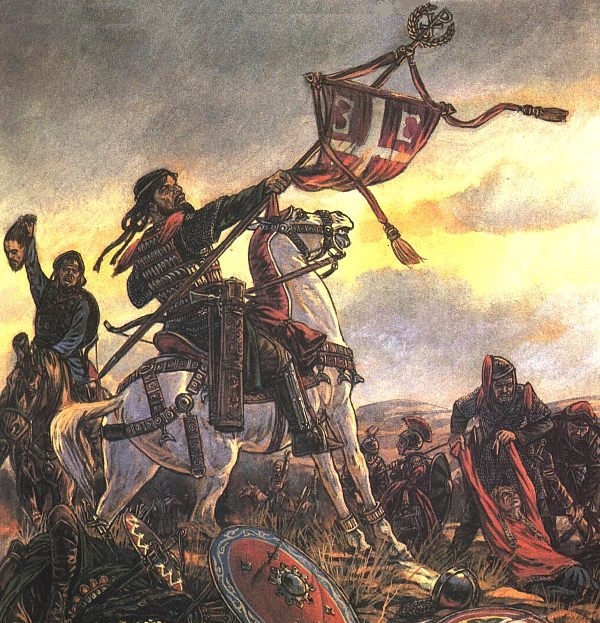 The Terrible Day: Disaster at Manzikert:
 The 25 Greatest Commanders of the Middle Ages:
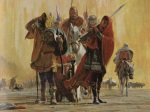 The Crusades: A Politically Incorrect View:
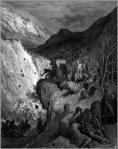 Myriocephalon: the Byzantine Resurgence Comes to a Disastrous End
 The Knights of France Defeat the Power of the Empire at Bouvines, 1214
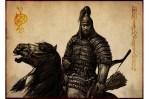 Great Captains: Chingis Khan
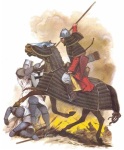 Legnica: The Mongol Terror Reaches Poland:
 End of the Caliphate: The Mongol Sack of Baghdad:
 Clash of Titans: Tamerlane at Angora, 1402
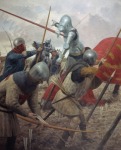 Slaughter in the Mud:Henry V at Agincourt:
 A Most Sanguinary Affair: Bloody Towton:
  Richard III’s Short Reign Ends at Bloody Bosworth:
 The 25 Greatest Commanders of the Renaissance: 1453-1650, Deadliest Blogger’s list of the greatest generals of the Renaissance.
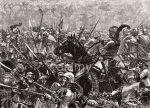 Marignano, Battle of Giants, Ends the Myth of Swiss Invincibility:
 Clash of Titans: Tamerlane and “Thunderbolt” meet at Angora!
 Mughal: “The Tiger” Founds an Empire at Panipat:
 Battle of Nagashino, 1575
 Great Warships of History: Korean Turtle Ship:
 The Lion of the North Roars at Breitenfield:
 Great Warships of History: Revenge, Race-Built Galleon:
 Great Warships of History: The Ship of the Line:
 Great Captains: Frederick the Great:
 Great Captains: Napoleon Bonaparte:
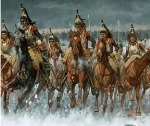 Sabres in the Snow: Murat at Eylau, 1807!
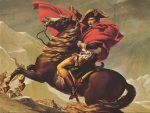

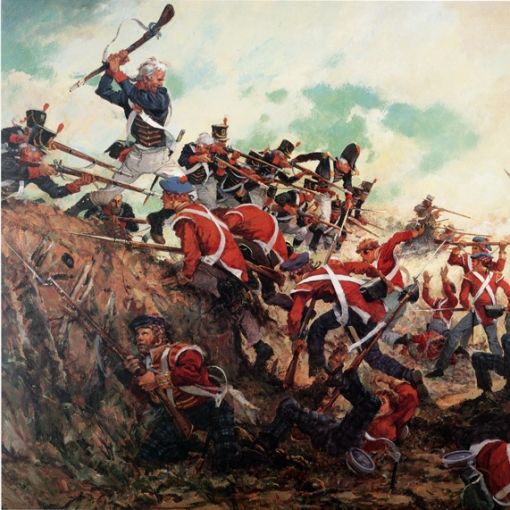 “Old Hickory” Breaks the Thin Red Line at New Orleans:
 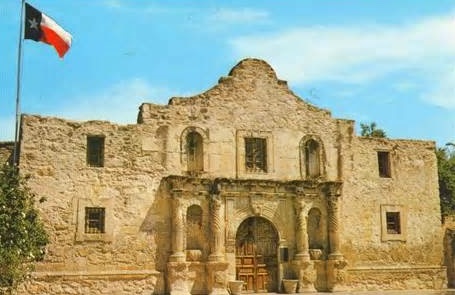 13 Days of Glory: the Alamo, 1836
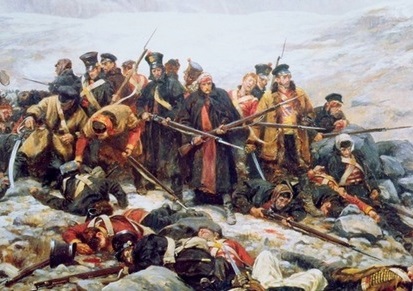 Massacre in the Passes: Elphinstone’s Disaster: 1842
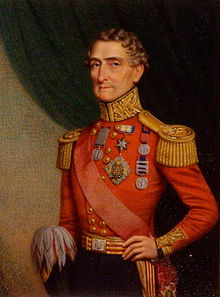 A Perfect Battle: Harry Smith Smashes the Savage Sikhs at Aliwal
 Great Captains: Nathan Bedford Forrest
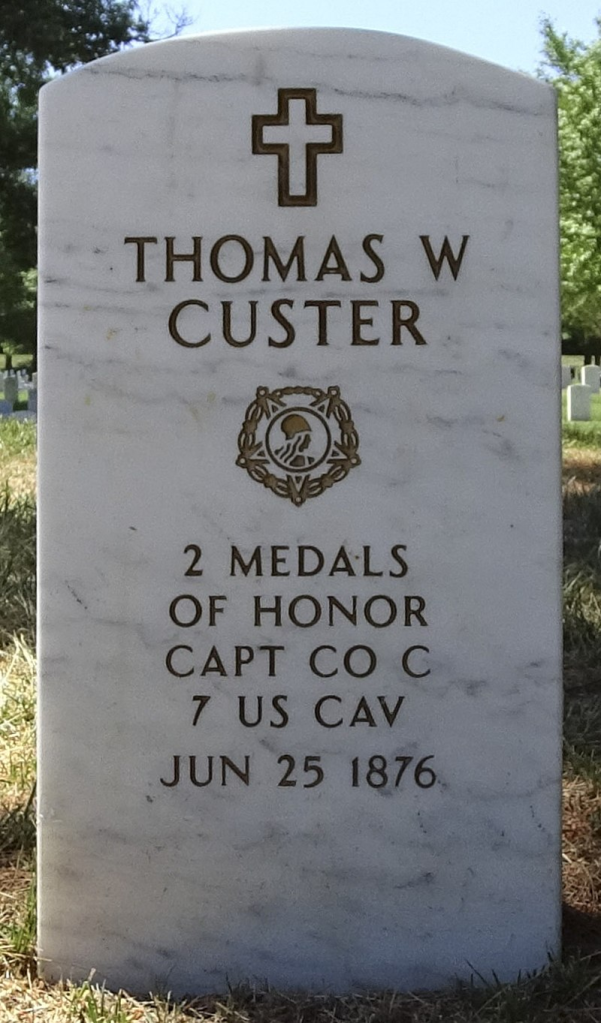
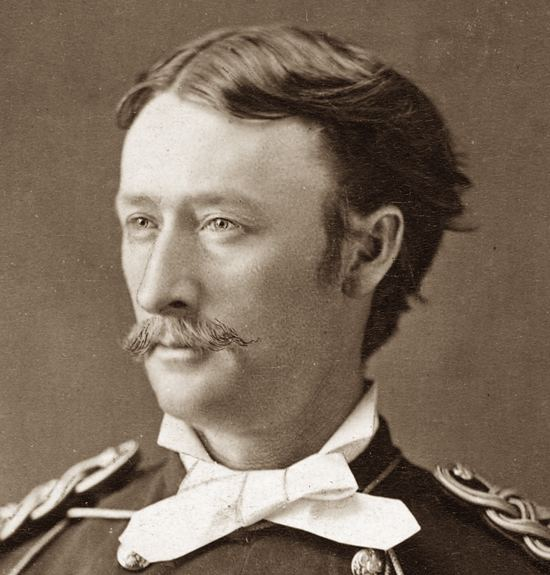 THE OTHER CUSTER
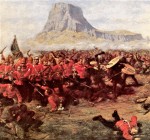 Zulu: Death and Redemption in the African Sun
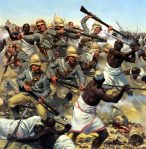 A “Most Savage Battle”: Abu Klea, 1885
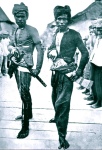 Juramentado: Moro Suicidal Assassins:
 Germany’s Schlieffen Plan: A Study in Economy of Force
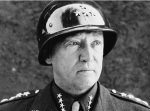 Great Captains: George S. Patton, Jr
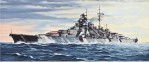 Great Warships of History: The Bismarck
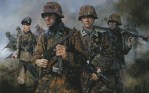 The Devil’s Guard: Hitler’s Waffen SS
 Great Warships of History: The Yamato
 Top Ten Generals in American
  Deadliest Bloggers’ Greatest Quotes on War: Part One
 Deadliest Blogger’s Greatest Quotes on War: Part Two
  Deadliest Blogger’s Greatest Quotes on War: Part Three
 Deadliest Blogger’s Greatest Quotes on War: Part Four
 Deadliest Blogger’s Greatest Quotes on War: Part Five
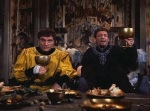 “History Bites”: The Fork, “a Hateful Vanity”
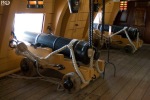 “History Bites”: Son of a Gun
 If World War One Were a Bar Fight!
 If World War Two Were a Bar Fight!
 British Military Kit Through the Ages
 The Most Bad Ass Military Units in History!


 This is a vivid description of the aftermath of pillage and despoliation. This was the likely fate of Calleva Atrebatum. When Ælle’s savage horde marched past in the late summer heat, it was but a ghost-haunted ruin, the still unburied skeletons of its citizens entombed under the scorched and fallen masonry.


 Three hundred shieldmaidens are said to have fought in the semi-legendary
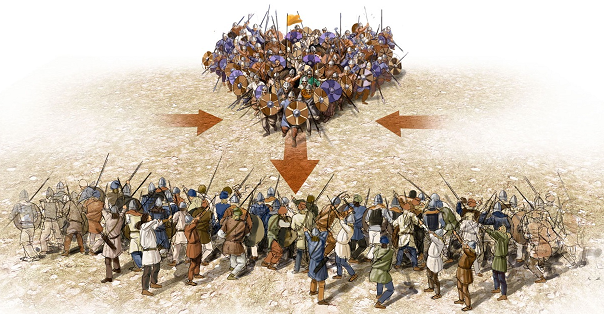
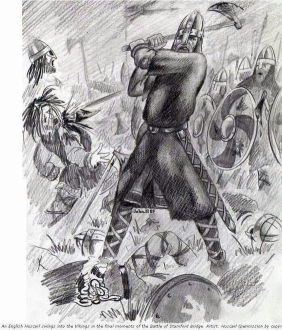
 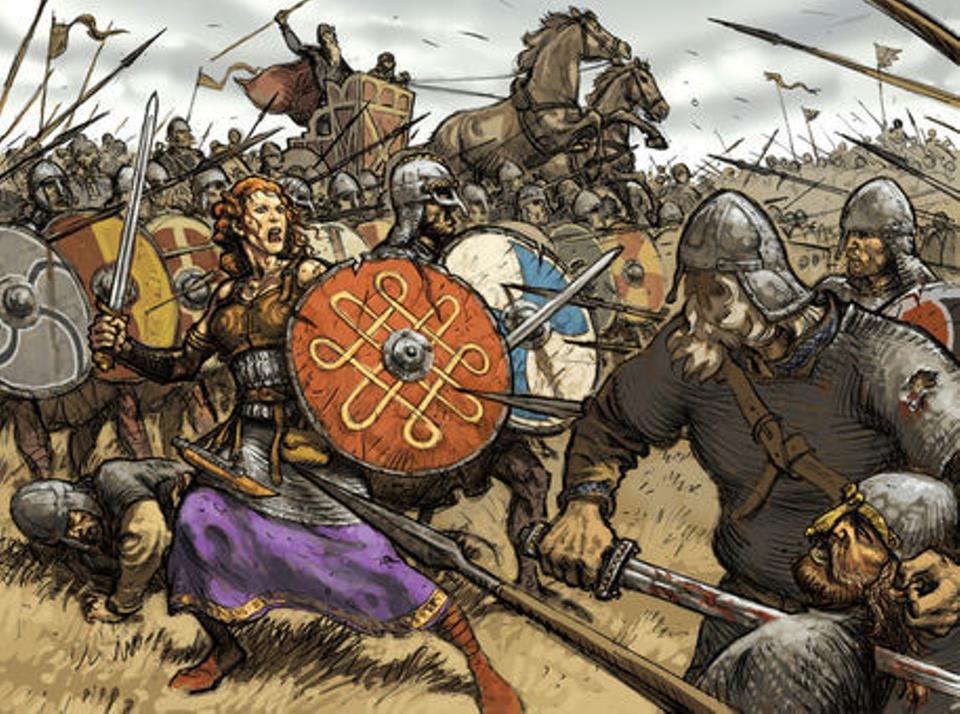 The Britons assault the hill, numbers and high morale making up for the disadvantage of terrain. The Angles put up a fierce and desperate resistance. But in warfare the impact of morale is decisive (Napoleon observing that “in war the morale is to the physical as two-to-one”; i.e., morale factors are twice as important as all mere “physical” factors ). This unexpected turn of events likely drained the pirates of their courage. In the battle of shieldwalls, the rot begins with the back ranks slipping away. A trickle of the cowardly soon becomes a flood, as the Angle line breaks in panic. Men (and women?) run for the safety of their ships, moored in the estuary, with the blood-hungry Britons close on their heels!
